

News, Stories and more
Our Blog
View BY :


Jacob Long's Nineteen Years of Roast Craft, Seasonal Sourcing, and the Soul of Artisan Coffee
June Feature | Roastmaster’s Select
There’s a particular fragrance that drifts through the roastery in the early morning before the harbor fully wakes up. Warm sugars beginning to caramelize. Citrus lifting from the drum. A fleeting note of cedar or cocoa carried out toward the Pacific fog.
For nearly two decades, that rhythm has belonged in part to Roastmaster Jacob Long.
This June marks Jacob’s 19th year at Thanksgiving Coffee Company, continuing a craft lineage that began with co-founder Paul Katzeff in the 1970s and stretches further still, through the farmers, cooperatives, and communities whose hands shape every harvest. What began in 2007 as an apprenticeship in artisan roasting has grown into one of the defining expressions of the Quarterly Roast Masters Select and the Roastmasters's Select Club: a living exploration of seasonality, processing innovation, and the ongoing craft of honest roasting.
At Thanksgiving Coffee, roasting is about relationship, calibration, curiosity, and honoring the potential hidden inside every green coffee seed.
And after more than fifty years of roasting coffee on the Mendocino Coast, with nineteen of them shaped alongside Jacob at the roaster, that sense of curiosity and care still moves through every batch that passes through the drum.
From Dark Roasts to Flavor Exploration
When Jacob entered the specialty coffee world in 2007, the industry was in the middle of a significant shift. Roasters were pushing toward lighter profiles, asking new questions about what coffee could taste like when the roast stepped back and let origin speak.
The conversation expanded quickly beyond country of origin into varietals, farmer lots, fermentation methods, and post-harvest experimentation. Processing techniques once rare or little known outside producing regions now shape some of the most sought-after coffees in the world.
Processing Method
1. Washed
2. Natural
3. Honey Process
4. Anaerobic Fermentation
Flavor Profile
1. Clean, bright, transparent acidity
2. Fruity, sweet, berry-forward
3. Syrupy body with layered sweetness
4. Wine-like complexity, tropical fruit, spice
Anaerobic coffees in particular have transformed modern specialty coffee. By fermenting coffee cherries in oxygen-free environments, producers can unlock deeply expressive flavor profiles unlike anything the industry experienced a generation ago: notes reminiscent of sangria, ripe mango, cacao nibs, or fermented berries.
For Jacob, this evolution opened the door to a new era of creativity. But it never changed the foundation.
“Paul really encouraged exploration. We already had a strong foundation and clear roasting parameters, but there was room to evolve, to seek out unique coffees and showcase what producers were truly capable of.”
That spirit helped shape Roastmaster’s Select, where seasonality, rarity, and craftsmanship take center stage.
June is also a time we recognize World Environment Day, and coffee reminds us how deeply flavor is connected to ecology. Altitude, rainfall, biodiversity, soil health, and careful stewardship all shape what ultimately arrives in the cup. Every harvest is a reflection of an ecosystem in consant motion.
“Paul really encouraged exploration. We already had a strong foundation and clear roasting parameters, but there was room to evolve, to seek out unique coffees and showcase what producers were truly capable of.” Jacob Long
Following the Harvest
Coffee is seasonal agriculture. Just as wine changes with vintage and climate, coffee moves through harvest cycles around the globe. One of the first things Jacob evaluates when selecting a coffee for Roastmaster’s Select is simple: is it the right moment for this bean?
Fresh crop coffees arrive with heightened aromatics, vivid acidity, and a clarity in the cup that slowly fades with time. Sourcing seasonally is not a preference. It is often the difference between a memorable coffee and a merely good one.
As Director of Coffee, Jacob works closely with trusted importers, cooperatives, and producers across many growing regions to source extraordinary coffees at peak freshness. His work combines sensory calibration, relationship-building, seasonal timing, and years of cupping experience to help shape each Roastmaster’s Select release.
This creates the opportunity to feature rare microlots, innovative processing methods, and seasonal offerings that many coffee drinkers rarely have the opportunity to experience.
As harvest seasons become less predictable and coffee communities adapt to new challenges, long-term relationships and shared knowledge have become essential to sustaining both exceptional coffee and the people who grow it.
Over the years, Roastmaster’s Select has featured coffees from:
- Ethiopia: Hafursa, Banko Dhadhato, Konga
- Nicaragua: Finca Alexa, Byron Corrales, Carlos Lanza, Reynaldo Mairena
- Honduras: COMSA, Miriam Perez
- Kenya: Nyeri Othaya Ichamama
- Peru: COCLA
- Guatemala: Los Jóvenes ASOBAGRI
- Tanzania: Zanzibar Peaberry
- Malawi: Mzuzu Cooperative
- Indonesia: Toarco Jaya, Sumatra, Flores
- Mexico: Enjambre Cafetalero
- Ecuador: FAPECAFES
- Bolivia: Caranavi
- Brazil: Southern Minas
- El Salvador: JJ Borja Nathan
- Laos
- Colombia
- Panama Geisha
- Papua New Guinea
- Costa Rica
- Yemen
- Uganda
- Congo
These coffees represent more than geography. They reflect distinct climates, elevations, varietals, processing innovations, and the evolving creativity of the people producing them.
Through the work of the Cupping Labs project, before “single farmer lots” became a marketing phrase across the industry, Thanksgiving Coffee initiated farmer-focused sourcing through it's Campesino campaign (2005), moving beyond broad regional designations to spotlight individual growers and cooperative communities by name.
That early work laid the foundation for Jacob to create what the Roastmaster’s Select is today: coffees chosen not simply for origin, but for the distinct personalities, processing styles, harvest conditions, and craftsmanship of the people behind them.
Roastmaster Jacob Long evaluating coffees in Thanksgiving Coffee’s cupping lab
The Craft Behind the Cup
Roasting coffee at this level requires constant calibration.
Jacob’s work extends far beyond standing beside the drum. Inside the cupping lab, coffees are evaluated for sweetness, balance, defects, mouthfeel, and aromatic complexity. Roast profiles are continuously refined through tasting and data analysis.
His training through the Specialty Coffee Association and the Coffee Roasters Guild spans sensory evaluation, green coffee grading, espresso profiling, quality control, barista education, and coffee purchasing: a full spectrum of the craft practiced daily inside the cupping lab.
But even with all the science, coffee remains deeply human.
Roastmaster’s Select is also a story of mentorship across generations. Jacob’s nineteen-year journey has unfolded alongside decades of wisdom shared by Paul Katzeff, whose sourcing philosophy, sensory calibration, and commitment to craft helped shape the foundation Thanksgiving Coffee continues to build upon today.
“There’s a real privilege in working with coffees like these. And being able to talk about them with Paul has always been special because we’re calibrated. We taste similarly. We understand what we’re looking for.” Jacob Long
That continuity matters. It connects the original artisan coffee movement of the 1970s and ‘80s with today’s evolving specialty landscape and with the farmers who made all of it possible.
The Artisan Revival
As coffee culture has accelerated, many companies have narrowed their sourcing or standardized offerings for efficiency. Roastmaster’s Select moves in the opposite direction.
It is built around curiosity, seasonality, and the belief that coffee can still surprise us: that there are still harvests worth waiting for, producers worth knowing by name, and roast profiles worth refining one batch at a time.
Each featured coffee becomes a window into a particular harvest, landscape, and way of tending the craft: a producer’s innovation, a region’s seasonal peak, a processing method newly emerging into wider recognition, or a fleeting flavor profile that may never appear exactly the same way again.
This is the heart of artisan roasting: not control over nature, but collaboration with it.
And after more than fifty years of roasting coffee on California’s North Coast, that sense of wonder still remains at the center of what we do.
Summer Solstice & Slow Coffee Rituals
Along the Mendocino Coast, summer does not arrive all at once. The season unfolds slowly through shifting marine layers, pockets of warm light, and the ongoing dance between fog and sun.
As the Summer Solstice approaches, mornings begin cool and quiet in Noyo Harbor before the light gradually breaks through. It is the kind of weather that invites long cups of coffee and afternoons shaped more by tide and wind than by the clock.
Whether brewed hot against the coastal chill or over ice when the sun finally takes center stage, Roastmaster’s Select is designed to move with the rhythm of the season and the harvest itself.
Along the harbor, coffee rituals shift with the season too. Most mornings call for a warm mug against the coastal fog, while brighter afternoons can invite slower cold brew pours shared between worktables, docks, and backyard gatherings.
We invite you to welcome this solstice season with a simple Roastmaster’s Cold Brew Float: rich coffee concentrate poured over vanilla ice cream for a balance of brightness, sweetness, and roast depth.
Roastmaster’s Cold Brew Float
A harbor-side ritual for shifting summer skies and slow North Coast afternoons.
Roastmaster’s Cold Brew Float
Ingredients:
- 4 oz cold brew concentrate
- 1 scoop vanilla ice cream
- Sparkling water (optional)
- Fresh grated chocolate or cinnamon
Instructions:
1. Fill a glass with ice.
2. Add cold brew concentrate.
3. Top with a scoop of vanilla ice cream.
4. Add a splash of sparkling water for lighter texture, if desired.
5. Finish with grated chocolate or cinnamon.
The result is creamy, bold, and beautifully balanced between sweetness and roast depth: a small ritual worth building into the solstice season.
Looking for a meaningful Father’s Day gift? The Roast Masters Club offers an ongoing journey through seasonal coffees, rare origins, and artisan roast craftsmanship for the person in your life who starts every morning with intention.
Explore Roastmaster’s Select
The Quarterly Roastmaster Select and the Roastmaster’s Select Coffee Club are designed for coffee drinkers who want to experience the evolving artistry of coffee harvests around the world, from washed Ethiopian coffees bursting with florals to experimental anaerobic lots layered with tropical fruit and spice.
For Jacob Long, the work remains both technical and deeply personal: listening closely to each coffee, honoring the harvest, and helping reveal the character already waiting inside the bean.
At Thanksgiving Coffee, we continue to follow the harvest with gratitude, curiosity, and deep respect for the people whose hands shape every cup.
Stay in touch, we love to hear from you
Following the Harvest: The Art of Roastmaster Jacob Long
For nineteen years, Roastmaster Jacob Long has helped shape the evolving craft of coffee at Thanksgiving Coffee Company. In this story, we follow the harvest through seasonal sourcing, innovative processing methods, and the relationships that connect farmers, roasters, and coffee drinkers across the globe. From rare microlots to the rhythms of Noyo Harbor, discover how craftsmanship, curiosity, and long-term partnerships continue to guide every Roastmaster’s Select release.
read more-
![Following the Harvest: The Art of Roastmaster Jacob Long]()

Jacob Long's Nineteen Years of Roast Craft, Seasonal Sourcing, and the Soul of Artisan Coffee
June Feature | Roastmaster’s Select
There’s a particular fragrance that drifts through the roastery in the early morning before the harbor fully wakes up. Warm sugars beginning to caramelize. Citrus lifting from the drum. A fleeting note of cedar or cocoa carried out toward the Pacific fog.
For nearly two decades, that rhythm has belonged in part to Roastmaster Jacob Long.
This June marks Jacob’s 19th year at Thanksgiving Coffee Company, continuing a craft lineage that began with co-founder Paul Katzeff in the 1970s and stretches further still, through the farmers, cooperatives, and communities whose hands shape every harvest. What began in 2007 as an apprenticeship in artisan roasting has grown into one of the defining expressions of the Quarterly Roast Masters Select and the Roastmasters's Select Club: a living exploration of seasonality, processing innovation, and the ongoing craft of honest roasting.
At Thanksgiving Coffee, roasting is about relationship, calibration, curiosity, and honoring the potential hidden inside every green coffee seed.
And after more than fifty years of roasting coffee on the Mendocino Coast, with nineteen of them shaped alongside Jacob at the roaster, that sense of curiosity and care still moves through every batch that passes through the drum.
From Dark Roasts to Flavor Exploration
When Jacob entered the specialty coffee world in 2007, the industry was in the middle of a significant shift. Roasters were pushing toward lighter profiles, asking new questions about what coffee could taste like when the roast stepped back and let origin speak.
The conversation expanded quickly beyond country of origin into varietals, farmer lots, fermentation methods, and post-harvest experimentation. Processing techniques once rare or little known outside producing regions now shape some of the most sought-after coffees in the world.
Processing Method
1. Washed
2. Natural
3. Honey Process
4. Anaerobic Fermentation
Flavor Profile
1. Clean, bright, transparent acidity
2. Fruity, sweet, berry-forward
3. Syrupy body with layered sweetness
4. Wine-like complexity, tropical fruit, spice
Anaerobic coffees in particular have transformed modern specialty coffee. By fermenting coffee cherries in oxygen-free environments, producers can unlock deeply expressive flavor profiles unlike anything the industry experienced a generation ago: notes reminiscent of sangria, ripe mango, cacao nibs, or fermented berries.
For Jacob, this evolution opened the door to a new era of creativity. But it never changed the foundation.
“Paul really encouraged exploration. We already had a strong foundation and clear roasting parameters, but there was room to evolve, to seek out unique coffees and showcase what producers were truly capable of.”
That spirit helped shape Roastmaster’s Select, where seasonality, rarity, and craftsmanship take center stage.
June is also a time we recognize World Environment Day, and coffee reminds us how deeply flavor is connected to ecology. Altitude, rainfall, biodiversity, soil health, and careful stewardship all shape what ultimately arrives in the cup. Every harvest is a reflection of an ecosystem in consant motion.
“Paul really encouraged exploration. We already had a strong foundation and clear roasting parameters, but there was room to evolve, to seek out unique coffees and showcase what producers were truly capable of.” Jacob Long
Following the Harvest
Coffee is seasonal agriculture. Just as wine changes with vintage and climate, coffee moves through harvest cycles around the globe. One of the first things Jacob evaluates when selecting a coffee for Roastmaster’s Select is simple: is it the right moment for this bean?
Fresh crop coffees arrive with heightened aromatics, vivid acidity, and a clarity in the cup that slowly fades with time. Sourcing seasonally is not a preference. It is often the difference between a memorable coffee and a merely good one.
As Director of Coffee, Jacob works closely with trusted importers, cooperatives, and producers across many growing regions to source extraordinary coffees at peak freshness. His work combines sensory calibration, relationship-building, seasonal timing, and years of cupping experience to help shape each Roastmaster’s Select release.
This creates the opportunity to feature rare microlots, innovative processing methods, and seasonal offerings that many coffee drinkers rarely have the opportunity to experience.
As harvest seasons become less predictable and coffee communities adapt to new challenges, long-term relationships and shared knowledge have become essential to sustaining both exceptional coffee and the people who grow it.
Over the years, Roastmaster’s Select has featured coffees from:
- Ethiopia: Hafursa, Banko Dhadhato, Konga
- Nicaragua: Finca Alexa, Byron Corrales, Carlos Lanza, Reynaldo Mairena
- Honduras: COMSA, Miriam Perez
- Kenya: Nyeri Othaya Ichamama
- Peru: COCLA
- Guatemala: Los Jóvenes ASOBAGRI
- Tanzania: Zanzibar Peaberry
- Malawi: Mzuzu Cooperative
- Indonesia: Toarco Jaya, Sumatra, Flores
- Mexico: Enjambre Cafetalero
- Ecuador: FAPECAFES
- Bolivia: Caranavi
- Brazil: Southern Minas
- El Salvador: JJ Borja Nathan
- Laos
- Colombia
- Panama Geisha
- Papua New Guinea
- Costa Rica
- Yemen
- Uganda
- Congo
These coffees represent more than geography. They reflect distinct climates, elevations, varietals, processing innovations, and the evolving creativity of the people producing them.
Through the work of the Cupping Labs project, before “single farmer lots” became a marketing phrase across the industry, Thanksgiving Coffee initiated farmer-focused sourcing through it's Campesino campaign (2005), moving beyond broad regional designations to spotlight individual growers and cooperative communities by name.
That early work laid the foundation for Jacob to create what the Roastmaster’s Select is today: coffees chosen not simply for origin, but for the distinct personalities, processing styles, harvest conditions, and craftsmanship of the people behind them.
Roastmaster Jacob Long evaluating coffees in Thanksgiving Coffee’s cupping lab
The Craft Behind the Cup
Roasting coffee at this level requires constant calibration.
Jacob’s work extends far beyond standing beside the drum. Inside the cupping lab, coffees are evaluated for sweetness, balance, defects, mouthfeel, and aromatic complexity. Roast profiles are continuously refined through tasting and data analysis.
His training through the Specialty Coffee Association and the Coffee Roasters Guild spans sensory evaluation, green coffee grading, espresso profiling, quality control, barista education, and coffee purchasing: a full spectrum of the craft practiced daily inside the cupping lab.
But even with all the science, coffee remains deeply human.
Roastmaster’s Select is also a story of mentorship across generations. Jacob’s nineteen-year journey has unfolded alongside decades of wisdom shared by Paul Katzeff, whose sourcing philosophy, sensory calibration, and commitment to craft helped shape the foundation Thanksgiving Coffee continues to build upon today.
“There’s a real privilege in working with coffees like these. And being able to talk about them with Paul has always been special because we’re calibrated. We taste similarly. We understand what we’re looking for.” Jacob Long
That continuity matters. It connects the original artisan coffee movement of the 1970s and ‘80s with today’s evolving specialty landscape and with the farmers who made all of it possible.
The Artisan Revival
As coffee culture has accelerated, many companies have narrowed their sourcing or standardized offerings for efficiency. Roastmaster’s Select moves in the opposite direction.
It is built around curiosity, seasonality, and the belief that coffee can still surprise us: that there are still harvests worth waiting for, producers worth knowing by name, and roast profiles worth refining one batch at a time.
Each featured coffee becomes a window into a particular harvest, landscape, and way of tending the craft: a producer’s innovation, a region’s seasonal peak, a processing method newly emerging into wider recognition, or a fleeting flavor profile that may never appear exactly the same way again.
This is the heart of artisan roasting: not control over nature, but collaboration with it.
And after more than fifty years of roasting coffee on California’s North Coast, that sense of wonder still remains at the center of what we do.
Summer Solstice & Slow Coffee Rituals
Along the Mendocino Coast, summer does not arrive all at once. The season unfolds slowly through shifting marine layers, pockets of warm light, and the ongoing dance between fog and sun.
As the Summer Solstice approaches, mornings begin cool and quiet in Noyo Harbor before the light gradually breaks through. It is the kind of weather that invites long cups of coffee and afternoons shaped more by tide and wind than by the clock.
Whether brewed hot against the coastal chill or over ice when the sun finally takes center stage, Roastmaster’s Select is designed to move with the rhythm of the season and the harvest itself.
Along the harbor, coffee rituals shift with the season too. Most mornings call for a warm mug against the coastal fog, while brighter afternoons can invite slower cold brew pours shared between worktables, docks, and backyard gatherings.
We invite you to welcome this solstice season with a simple Roastmaster’s Cold Brew Float: rich coffee concentrate poured over vanilla ice cream for a balance of brightness, sweetness, and roast depth.
Roastmaster’s Cold Brew Float
A harbor-side ritual for shifting summer skies and slow North Coast afternoons.
Roastmaster’s Cold Brew Float
Ingredients:
- 4 oz cold brew concentrate
- 1 scoop vanilla ice cream
- Sparkling water (optional)
- Fresh grated chocolate or cinnamon
Instructions:
1. Fill a glass with ice.
2. Add cold brew concentrate.
3. Top with a scoop of vanilla ice cream.
4. Add a splash of sparkling water for lighter texture, if desired.
5. Finish with grated chocolate or cinnamon.
The result is creamy, bold, and beautifully balanced between sweetness and roast depth: a small ritual worth building into the solstice season.
Looking for a meaningful Father’s Day gift? The Roast Masters Club offers an ongoing journey through seasonal coffees, rare origins, and artisan roast craftsmanship for the person in your life who starts every morning with intention.
Explore Roastmaster’s Select
The Quarterly Roastmaster Select and the Roastmaster’s Select Coffee Club are designed for coffee drinkers who want to experience the evolving artistry of coffee harvests around the world, from washed Ethiopian coffees bursting with florals to experimental anaerobic lots layered with tropical fruit and spice.
For Jacob Long, the work remains both technical and deeply personal: listening closely to each coffee, honoring the harvest, and helping reveal the character already waiting inside the bean.
At Thanksgiving Coffee, we continue to follow the harvest with gratitude, curiosity, and deep respect for the people whose hands shape every cup.
Stay in touch, we love to hear from you
Following the Harvest: The Art of Roastmaster Jacob Long
read more -
![Bee Bold & Blooming: Coffee That Helps the World Flower]()

A May Invitation: Bees Make the World Bloom
There’s a moment in May when the air begins to hum.
You can feel it in the movement between blossoms, in the soft presence of bees at work, in the quiet unfolding of the season. This is the time when the world leans into bloom.
At Thanksgiving Coffee Company, coffee has always been a way of participating in that living system - connecting farmers, ecosystems, and daily ritual through a shared practice of care.
This May, we celebrate that connection through Bee Bold Medium Roast, a coffee crafted to support pollinator health and the ecosystems that coffee depends on.
Featured Coffee: Bee Bold Medium Roast
Crafted with Care, Connected to Biodiversity
Bee Bold is a vibrant blend of Central & South American and Ethiopian coffees, combining natural and washed processes to create a cup that is both lively and grounded.
In the cup:
- Bright fruit notes
- Deep sweetness
- A smooth, lasting finish
This coffee reflects the kind of sourcing we’ve practiced for decades, working with producers who grow coffee in ways that support biodiversity, soil health, and long-term resilience.
Through every purchase, Bee Bold contributes directly to pollinator protection through our partnership with Conservation Works - helping fund on-the-ground efforts that protect the species essential to our food systems.
Why Bees Matter: The Work Behind the Bloom
Bees and other pollinators play a vital role in the health of our ecosystems - including coffee farms.
When pollinators are present:
- Coffee plants produce more abundant and consistent harvests
- Flavor complexity can improve
- Farms become more resilient over time
When we choose pollinator-friendly coffee, we participate in something much larger than a morning ritual. We help restore the delicate balance that allows life to flourish.
Thanksgiving Coffee's Headquarters is 3 acres of Pollinator Protected Zone.
World Bee Day & The Flower Moon
May carries a constellation of meaning:
- Mother’s Day (May 10): honoring care, nourishment, and life-giving forces
- Endangered Species Day (May 15): recognizing what needs protection
- World Bee Day (May 20): celebrating pollinators
- International Day for Biological Diversity (May 22): protecting the web of life
- Memorial Day (May 26): a time for remembrance and gratitude
The Flower Moon rises in this same window—reminding us that blooming is not an accident. It is the result of relationship, timing, and attention.
The Bee Bold Challenge
This month, we invite you into action. Be a Pollinator Protector!
- 🌱 Plant pollinator-friendly flowers
- 🐝 Support local ecosystems
- 📸 Share your garden or blooms
- 🏷 Tag #BeeBold
Even a small patch of flowers can become a sanctuary.
Small acts, repeated across many places, create real change.
Recipe: Bee Bold Iced Honey Latte
Text
A simple ritual for warm days
Bee Bold Iced Honey Latte
Ingredients:
- 1 cup brewed Bee Bold Medium Roast (cooled)
- ½ cup milk - your choice
- 1–2 tsp local honey
- A pinch of culinary lavender (optional)
- Ice
Directions:
-
Brew your coffee and allow it to cool
-
Stir in honey while still slightly warm
-
Fill a glass with ice
-
Pour coffee over ice, then add your milk choice
-
Sprinkle lavender gently on top
Taste: floral, smooth, lightly sweet—like spring in a glass
A Closing Reflection
Every cup of coffee is part of a larger system, one that connects land, people, and daily life.
For over fifty years, we’ve worked to build that system with care: through long-term farmer relationships, thoughtful sourcing, and a commitment to quality that honors both our craft and our ecology.
Bee Bold is one expression of that work, supporting pollinators, biodiversity, and the conditions that allow coffee to flourish.
This May, may your cup be part of something that continues to grow.
Lavender Grace Kent is the Director of Brand Narrative and Culture
Stay In Touch - We like to stay connected
Bee Bold & Blooming: Coffee That Helps the World Flower
read more -
![Songbirds of the Forest: Brewing Habitat in Every Cup]()

A Cup That Sounds Like the Forest
There’s a moment in the morning, before the day fully arrives, when everything is still soft.
The kettle hums. Light moves through the trees. And when the coffee begins to pour, there’s a feeling, like something living is arriving with it.
Our Songbird Nicaraguan Coffee carries that feeling. This is our shade-grown, bird-friendly coffee, cultivated beneath forest canopy where songbirds still find habitat along their migratory paths.
Bird-friendly coffee is one of the most effective everyday ways to support migratory bird habitat.
And when you brew it, you are part of that living system.
Nicaraguan Farmer in a Shade Grown Coffee Forest
Why Shade Grown Coffee Matters More Than Ever
The forests that sustain migratory birds are under pressure.
The Smithsonian Migratory Bird Center has spent decades studying and protecting bird migration across the Western Hemisphere. Their work helps make one thing clear: birds need healthy, connected habitat to survive.
Right now, that system is breaking down. Since 1970, bird populations in the U.S. and Canada have declined by 29%, or nearly 3 billion birds. Not only rare species, but common birds too. Backyard birds. Songbirds. The ones many of us grew up hearing.
Birds are indicators of ecological health. When they decline, it tells us something deeper is out of balance.
That is one reason this coffee matters.
For nearly three decades, we’ve partnered with the American Birding Association to help protect that habitat through coffee.
What began as a shared belief, that coffee could be grown in a way that supports bird life, has grown into one of our longest-standing relationships. Together, we’ve supported shade-grown practices that allow forests to remain intact, creating space for migratory birds to rest, feed, and continue their journeys.
This is what bird-friendly coffee makes possible.
What is Shade Grown Coffee?
Shade-grown coffee is coffee grown beneath a diverse canopy of trees instead of in cleared, sun-exposed fields.
This kind of farming helps create:
- habitat for migratory birds
- healthier soil and water systems
- natural biodiversity on the farm
- slower cherry development, which often leads to richer flavor
In simple terms: better habitat supports better coffee.
That has long been part of our understanding at Thanksgiving Coffee. Great coffee and healthy ecosystems belong together.
How do we grow coffee in a way that supports land, people, and ecosystems together?
A Legacy of Environmental Leadership
This work didn’t begin recently at Thanksgiving Coffee.
In the early years of specialty coffee, our team helped establish the first Environmental Committee within the Specialty Coffee Association of America - what today would be recognized as an early form of a sustainability committee in the coffee industry.
At the time, the language was different. But the intention was clear: to bring ecological responsibility into how coffee is grown, sourced, and shared.
Paul and Joan Katzeff worked across farmers, cooperatives, and industry leaders to help connect people around a shared understanding that coffee exists within a living system.
Today, many call this coffee sustainability leadership.
At its root, it was something simpler: whole systems thinking.
That:
- coffee quality is connected to farmer wellbeing
- farmer wellbeing is connected to ecosystem health
- ecosystem health is connected to how we all participate
This has never been separate from the coffee. It is the coffee.
Where Coffee Sustainability Began: A Whole Systems Approach
Long before sustainability became standard language in coffee, it began as a question of relationship.
How do we grow coffee in a way that supports land, people, and ecosystems together?
This question guided early collaboration across the industry - bringing together farmers, environmental advocates, and coffee professionals to think beyond the cup.
From extraction to relationship.
From product to system.
From short-term yield to long-term vitality.That shift continues to shape coffee today.
Meet the Coffee: Songbird Nicaraguan
Tasting Notes
Cocoa richness
Gentle citrus brightness
Smooth, balanced finishOrigin
Nicaragua, sourced through long-standing cooperative partnershipsRoast
Medium roast, crafted for clarity and body👉 Shop Songbird Nicaraguan Coffee
Part of our Songbird Coffee line, developed in partnership with the American Birding Association, this coffee reflects nearly 30 years of shared commitment to protecting bird habitat through shade-grown farming. It’s a relationship built slowly, like forests themselves.
Brewing Habitat: A Daily Ritual
There are large challenges in the world.
And there are daily practices that quietly shape what comes next.
When you choose bird-friendly, shade-grown coffee, you are supporting:
- forest ecosystems
- migratory bird pathways
- farmers working in balance with the land
It is not abstract.
It is immediate.
It is in your cup.Watch how habitat, birds, and coffee are connected across continents.
Recipe: Citrus Bloom Cold Brew
A bright, floral expression of Songbird Nicaraguan.
Ingredients
- 1 cup coarsely ground Songbird Nicaraguan coffee
- 4 cups cold filtered water
- zest of 1 orange
- 1–2 teaspoons wildflower honey
- ice
Directions
- Steep coffee and water for 12–16 hours in the refrigerator
- Strain slowly
- Add orange zest and honey
- Serve over ice
Citrus cold brew coffee with orange zest and honey
7 Ways to Support Songbirds,
Starting With Your Cup
The good news is this: while the challenges are real, there are meaningful ways to help.
- Choose Bird-Friendly Coffee. More than 70 species of migratory songbirds depend on coffee farms for habitat. Shade-grown coffee helps preserve that habitat.
-
Plant Native Species. Even small spaces can provide food and shelter for birds.
-
Avoid Pesticides. Reducing chemical use supports birds and the ecosystems they rely on.
-
Make Windows Safer. Simple changes can reduce bird collisions.
-
Keep Cats Indoors. Protects both birds and pets.
-
Reduce Single-Use Plastics. Supports broader ecosystem health.
- Pay Attention. Noticing birds is part of protecting them.
Start With the Cup
Brew coffee that protects habitat. Let that choice ripple outward.
Earth Month: A Moment to Choose Differently
April brings us back into awareness:
- Earth Month (April)
- Earth Day (April 22)
- Arbor Day (April 24)
These are reminders, and also invitations.
The future of birds, forests, and farming systems is shaped by everyday choices.
From Forest to Cup
From the highlands of Nicaragua to your kitchen, there is a thread.
Birds in motion.
Farmers tending trees.
Water, soil, and time.And you.
Not just a cup, but a living system that is held for a moment in your hands.
FAQ Section
What is bird-friendly coffee?
Coffee grown under forest canopy that supports bird habitat and biodiversity.
Why is shade-grown coffee important?
It protects ecosystems, supports wildlife, and improves coffee quality.
What is a sustainability committee in coffee?
Today, sustainability committees guide environmental and social practices. This work began with early environmental leadership efforts in specialty coffee, including the first Environmental Committee.
How can I support bird-friendly coffee?
Choose shade-grown coffee, reduce pesticides, plant native species, and support responsible sourcing. From Forest to CupBring the Forest Home
Brew with intention.
Choose shade-grown coffee.
Share your ritual.
Lavender Grace Kent is the Director of Brand Narrative and Culture
Stay In Touch - We like to stay connected
Songbirds of the Forest: Brewing Habitat in Every Cup
read more -
![Women Brew the Future | Flor de Jinotega]()

The Just Cup of Her Hands
There are hands behind every coffee harvest.
Hands that plant seedlings beneath shade trees.
Hands that sort cherries at dusk.
Hands that manage homes, finances, children, and crops.
Hands that rarely make the headlines.This March, during Women’s History Month, we honor the women who quite literally brew the future.
Our featured coffee is Flor de Jinotega, grown by the women and families of the SOPPEXCCA Cooperative in Nicaragua. This single origin is available in 5lb format for foodservice and serious home brewers, this coffee represents something steady and powerful: economic dignity rooted in community.
This is shade-grown Nicaraguan coffee cultivated under diverse canopy trees. Those trees do more than protect flavor. They provide winter habitat for migratory songbirds and preserve soil integrity for future generations.
We have long believed that quality of life and quality of coffee go hand in hand. When farmers thrive, flavor deepens.
Origin: Jinotega, Nicaragua
Producer: SOPPEXCCA Cooperative
Growing Method: Shade-grown
Roast: MediumFlavor Profile
Cocoa warmth
Soft citrus brightness
Balanced sweetness
A grounded, elegant finish
Women In Coffee Farming:
Recognizing The Unpaid Work
Across Latin America, women perform critical agricultural labor while also carrying the majority of unpaid household work. Historically, much of that contribution has not been financially recognized.
SOPPEXCCA has worked intentionally to change this dynamic.
Through Fairtrade premiums and internal cooperative programs, they invest in:
- Women’s leadership roles within the cooperative
- Access to land titles
- Financial literacy training
- Micro-loan opportunities
- Educational advancement for children
This is not symbolic empowerment. It is structural empowerment.
And when women gain economic agency, farms become more resilient. Environmental stewardship strengthens. Communities stabilize.
That alignment between social justice and ecological care reflects the very heart of our founding philosophy.
Recipe: Cardamom Rose Coffee Cake
Made with Flor de Jinotega
This cake mirrors the coffee’s balance with floral lift, warm spice, grounded sweetness.
Ingredients:
2 cups flour
1 cup raw sugar
1 cup brewed Flor de Jinotega (cooled)
½ cup yogurt
2 eggs
1 tsp crushed cardamom
1 tbsp culinary rosewater
½ cup olive oil
Pinch sea saltMethod
Preheat oven to 350°F. Grease an 8–9 inch pan.Whisk eggs and sugar until slightly lightened. Add olive oil, yogurt, cooled coffee, and rosewater.
In a separate bowl, combine flour, cardamom, and salt. Fold into wet ingredients gently, just until combined.
Pour into pan and bake 35–40 minutes, until a toothpick comes out clean. Rest 10 minutes before removing.
Optional Finish
Drizzle with a light almond glaze or scatter sliced almonds before baking for a subtle crunch.Serve warm with a fresh cup of Flor de Jinotega. The cocoa and citrus notes carry the spice beautifully.
Spring Equinox & Renewal
March 20 marks the Spring Equinox — a moment of balance between light and dark.
There is something fitting about pairing that moment with a coffee grown under shade canopy, where light filters through branches in measured generosity.
Women in coffee farming embody that balance daily, production and protection, leadership and care, labor and love.
All Blends: Brewing Community Together
While Flor de Jinotega is our March spotlight, we also invite you to explore our full collection of coffee blends:
Each roast represents long-term partnership and artisanal roasting rooted in Mendocino’s coastal legacy.
Flor de Jinotega is currently available in 5lb format — ideal for cafés, offices, restaurants, and serious home brewers who believe coffee should carry meaning.
Why It Matters
More than 125 million people globally depend on coffee farming for their livelihood. When we center women in that equation, we strengthen the entire system.
This is what we mean when we say we are brewing a movement of justice, sustainability, and hope
Women brew the future.
We simply help tell the story.👉 Brew With Us
• Shop Flor de Jinotega (5lb)
• Explore all Thanksgiving Coffee blends
• Share your brew on Instagram during Women’s History Month
• Tag us for a chance to be featuredBecause every just cup begins in someone’s hands.
Lavender Grace Kent - Director of Brand Narrative & Culture
Women Brew the Future | Flor de Jinotega
read more -
![Our CBD is Discontinued]()

Our CBD Infused Coffees Are Discontinued
The time has come for us to make a change for the better. Mendocino Morning and Evening Gold Coffee infused with CBD oil will no longer be offered by Thanksgiving Coffee Company. We will continue to focus on what we do best, roast coffee. If you want your CBD you can brew our coffee and add your own CBD to your cup. We used an average of 5-6 mg of CBD for a 8 oz cup of coffee.
In short, the multi-faceted regulations and the time-consuming processes to bring the CBD coffee blend no longer serve our company. We apologize for any inconvenience this may cause you. Our CBD Morning Coffee was made from our The Upsetter Light Roast Espresso – the blend that won the 2019 Good Food Award. The Evening Gold Blend was made from Northern Italian Style Decaf Espresso organically grown and decaffeinated naturally without the use of chemicals. Both of these products are still available for the great taste you love.
Our CBD coffees are going away. These great coffees are still available without CBD
Sold outSold outOur CBD is Discontinued
read more -
![Love the Land, Love the People]()

February arrives with a quieter kind of brightness. Mornings linger. Hands wrap around warm mugs. Love shows up not as spectacle, but as care given daily. At Thanksgiving Coffee Company, this is where love lives too. In the soil that feeds the coffee tree. In the families who tend it. In the steady relationships that make great coffee possible.
This month, we’re honoring Byron’s Blend, one of our most enduring legacy coffees, through the lens of love in action. Love for land. Love for people. Love that grows slowly, season after season.
Love Grows in the soil
Byron’s Blend is built on the simple truth that quality of life and quality of coffee are inseparable. When farmers are supported, when land is cared for with intention, flavor deepens. This blend reflects decades of partnership with smallholder farmers who farm with patience, skill, and respect for their ecosystems.
The coffees in Byron’s Blend are shade-grown, allowing coffee trees to mature beneath protective canopies that nourish soil health, retain moisture, and support biodiversity. Shade-growing is slower. It’s more work. And it’s worth it. The result is a cup with balance, depth, and a quiet confidence that doesn’t rush to impress.
In February, as we observe Black History Month, we also pause to honor the often-unseen agricultural wisdom passed down through generations across the global coffee world. Many of today’s regenerative practices have deep roots in traditional land stewardship, carried forward through resilience, care, and community knowledge. Byron’s Blend is one small way we say thank you.
Byrons Blend
The Corrales' at Home
A coffee made for every day rituals
Byron’s Blend is not a special-occasion coffee. It’s something better. It’s the coffee you reach for on a slow morning. The one that’s forgiving if your grind isn’t perfect. The one that tastes just as good brewed for two as it does poured into a travel mug on the way out the door.
Flavor profile highlights:
- Warm cocoa and toasted grain
- Subtle nutty sweetness
- Balanced body with a clean finish
It’s a blend designed for consistency and comfort, without ever being dull. That balance is what makes it ideal for shared rituals. This month’s featured reel, Love Grows in the Soil, captures couples brewing together, moving at an unhurried pace, letting the day begin gently. Coffee as a shared language. Coffee as care.
Valentine’s Day, Reimagined
Valentine’s Day doesn’t have to be loud to be meaningful. Sometimes love looks like brewing the first pot. Sometimes it’s choosing something thoughtfully made. Sometimes it’s a quiet kindness repeated often.
During Random Acts of Kindness Week, we invite you to extend your coffee ritual outward. Brew a little extra. Share a bag. Write a note. Support the people behind what you love.
Byron’s Blend makes that easy. It’s approachable, generous, and rooted in relationships that span decades. That’s romance, in our book.
Recipe: Coffee Cacao Truffles with Byron’s Blend
These truffles are rich, grounding, and not too sweet. Perfect with an afternoon cup or as a handmade Valentine’s gift.
Ingredients
- 1 cup dark chocolate chips (70% cacao recommended)
- ½ cup heavy cream or coconut cream
- 2 tbsp finely ground Byron’s Blend (espresso grind)
- 1 tbsp unsalted butter or coconut oil
- Cocoa powder for rolling
- Optional: pinch of sea salt or cinnamon
Instructions
- Warm the cream gently until just steaming. Remove from heat.
- Stir in the ground Byron’s Blend and let steep for 5 minutes.
- Strain the cream, pressing gently to extract flavor.
- Reheat briefly if needed, then pour over chocolate and butter.
- Let sit for 2 minutes, then stir until smooth.
- Chill mixture for 1–2 hours until firm.
- Roll into small balls and dust with cocoa powder.
Serve alongside a fresh brew of Byron’s Blend and linger a little longer than usual.
A Legacy You Can Taste
Byron’s Blend carries forward what we’ve believed since 1972: that coffee can be both excellent and ethical, comforting and meaningful. It doesn’t chase trends. It stands on relationship, transparency, and time.
If you’re new to Thanksgiving Coffee, this is a beautiful place to begin. If you’ve loved Byron’s Blend for years, thank you for continuing the ritual with us.
Further ways to engage this month:
- Brew Byron’s Blend and share your morning ritual with us on social
- Try the truffle recipe and tag your creation
- Explore our Legacy Line to taste the coffees that shaped our journey
- Consider a subscription to keep your ritual rooted and steady
Because love doesn’t have to be loud.
Sometimes, it just needs to be brewed.
Shop Byron’s Blend and bring this legacy coffee into your February mornings.
Lavender Grace is a Creative Consultant for Thanksgiving Coffee Company.
Stay in touch - we like to stay connected
Love the Land, Love the People
read more -
![Paul's Blend: Roots of Justice]()

Roots of Justice | Paul’s Blend –
Our Founders’ RoastJanuary is a month of return.
After the rush of the holidays, we slow down, reflect, and set intentions for the year ahead. At Thanksgiving Coffee Company, January brings us back to the beginning - to the land, the relationships, and the values that shaped who we are.Paul’s Blend is where that story starts.
Born on the Mendocino Coast in 1972, this Founders’ Roast honors Paul Katzeff’s lifelong belief that coffee could be more than a commodity - that it could be a tool for justice, dignity, and connection between people and place.
This is the coffee that carries our roots.
Paul Katzeff at the original roastery on Noyo Harbor, CA
A Cup Born from Mendocino
Thanksgiving Coffee Company was founded in a working harbor town shaped by fishermen, artists, and back-to-the-land dreamers. Mendocino’s rugged coastline and radical imagination influenced everything - from how we roasted coffee to how we built relationships with farmers around the world.
Paul’s Blend reflects that origin story. It is a classic medium roast crafted with consistency and care, developed through decades of roasting experience and long-standing partnerships with smallholder farmers.
This is not a trend coffee.
It’s a foundational one.Original roastery on the Noyo Harbor, California
Ariel view of the Noyo Harbor with original roastery and new roastery
Roots of Justice in Every Cup
Paul Katzeff came to coffee as a social worker and community organizer. That background shaped the values that still guide Thanksgiving Coffee today:
- Long-term, direct relationships with farming partners
- Paying prices that honor labor and sustain families
- Investing in farmer-led quality control and education
- Believing that quality of life and quality of coffee go hand in hand
Paul helped pioneer farmer-owned cupping labs, co-founded the Specialty Coffee Association, and advocated for organic and shade-grown coffee before it was mainstream.
Paul’s Blend is a tribute to that legacy - steady, thoughtful, and built for the long view.
Paul’s Blend Organic Medium Roast coffee.
Flavor Profile: A Foundational Medium Roast
Paul’s Blend is designed to be approachable, balanced, and deeply satisfying—an everyday coffee shaped by decades of craft and care.
Tasting Notes:
- Blueberry and gentle fruit sweetness
- Smooth cocoa and milk chocolate tones
- Soft cashew nuttiness
- Clean, comforting finish
It’s a coffee that meets you in the morning and stays with you through the day - expressive without being loud, familiar yet layered, and grounded in the flavors Paul has always loved most.
Paul's Blend is one of the award-winning coffee roasts from our 2017 Roaster of the Year prize.
Honoring Martin Luther King Jr. and the Roots of Economic Justice
January is also a time to honor leaders who shaped the path toward justice, dignity, and shared responsibility. As we observe Martin Luther King Jr., we reflect on Dr. King’s enduring belief that civil rights and economic justice are inseparable - that a truly just society must honor the dignity of labor and ensure fairness within the systems that sustain everyday life.
Dr. King spoke often about the moral responsibility of both institutions and individuals, calling for an economy rooted in respect, equity, and human worth. He believed that progress is built not only through historic moments, but through consistent, values-driven actions - often quiet and unseen- that collectively shape the future.
Choosing where your coffee comes from is one of those choices. Every cup of Paul’s Blend supports long-standing relationships, ethical sourcing, and a belief that economic fairness begins with respect and reciprocity.
The 1963 March on Washington for Jobs and Freedom, where civil rights and economic justice were brought together in a call for dignity, fair labor, and shared humanity.
The March on Washington for Jobs and Freedom stands as a powerful reminder that the movement for civil rights was also a movement for economic justice. It called for fair labor, living wages, and systems that recognize the full dignity of every person’s work.
Dr. Martin Luther King Jr. understood that justice must be woven into daily life - from wages and work to how communities care for one another. As we reflect on this moment in January, we are reminded that meaningful change is carried forward through sustained commitment and everyday choices - values lived out not only in moments of history, but in the practices we choose to uphold.
Paul’s East Harlem Buying Club, 1962
These photographs document a food buying club organized by mothers in East Harlem in 1962, operating out of the basement of a public housing project. Faced with high food prices, limited access to fresh ingredients, and the daily pressures of poverty, these women came together to solve a shared problem: food security for their families.
By pooling resources and purchasing food collectively, they lowered household food costs and increased disposable income - profits were shared, and expenses reduced through cooperation rather than competition. The food they sourced reflected their own cultural traditions, allowing families to eat healthier, familiar meals while maintaining dignity and autonomy.
Mothers in East Harlem working together in 1962 to organize a cooperative food buying club, using collective purchasing to improve food access, reduce costs, and strengthen community resilience. Photos by Paul Katzeff
An unexpected outcome emerged alongside the economic impact. The act of solving a community problem together fostered pride, hope, and a renewed sense of agency. The enthusiasm visible in these images reflects more than a transaction - it reveals the mental and emotional benefits of collective action and women-led leadership.
This grassroots model would later inform the next generation of food cooperatives, including Ukiah Natural Foods, and ultimately influence the cooperative principles that shaped businesses like Whole Foods Market. Long before “alternative food systems” entered the mainstream, these women demonstrated that necessity, creativity, and cooperation could build resilience from the ground up.
The values that shaped this moment - cooperation, dignity, and shared prosperity - would later shape how Paul approached coffee. Paul’s Blend carries that lineage forward, offering a daily ritual grounded in justice, relationship, and care.
Simple Recipe:
Paul’s Mendocino Morning LatteA grounding ritual for the start of the year.
Ingredients:
- Double espresso brewed with Paul’s Blend
- Steamed milk
- Light honey drizzle
Instructions:
- Pull a double espresso using Paul’s Blend.
- Steam milk until silky.
- Combine and finish with a gentle honey drizzle.
Enjoy slowly - best paired with a quiet January morning and a clear intention for the day ahead.
A Cup That Started a Movement
Paul’s Blend is more than our Founders’ Roast.
It’s a reminder of what’s possible when coffee is rooted in land, relationship, and justice.As we begin a new year, we invite you to start your mornings with intention - grounded in gratitude, guided by values, and connected to a story that began over fifty years ago on the Mendocino Coast.
Where to Go Next
Stay Connected
Join our Mailing List - for stories from origin, brewing tips, and seasonal releases.
With Gratitude Since 1972
To our farmers, our Mendocino community, and everyone who shares this daily ritual with us - thank you.
Your cup carries our roots forward.
Not Just a Cup, But a Just Cup™
Lavender Grace is the Sustainability Consultant for Thanksgiving Coffee Company
Stay in touch - we like to stay connected
Paul's Blend: Roots of Justice
read more -
![Global Citizenship Through Coffee: The Bridges We Build]()

COFFEE AS A CULTURAL BRIDGE
December on the Mendocino Coast carries a special kind of quiet as the fog lifts off the headlands, the lights in kitchen windows glow, and that first cup of coffee warms cold hands. This December we want to celebrate Global Citizenship: the understanding that every cup we brew is connected to lives and landscapes far beyond our own.
For more than fifty years, coffee has been our medium.
Our message is building connection.From our roastery in Fort Bragg spanning all the way to the hillsides of Rwanda, our work is guided by our intention: to inspire possibility and awaken potential in the communities we serve.
This month, we honor Rwanda’s story of healing, the spirit of the Dr. Jean Mayer Global Citizenship Award, and the farmers whose craft fills your cup.
Honoring the Dr. Jean Mayer Global Citizenship Award
In 2008, the interfaith coffee farmers of East Africa and Thanksgiving Coffee Company were honored with the Dr. Jean Mayer Global Citizenship Award from the Institute for Global Leadership at Tufts University.
The award recognized:
- our commitment to ethical and fair trade;
- our work empowering and connecting farmers and consumers;
- our pursuit of economic and social justice and environmental sustainability;
- and our belief that every person can help create a more peaceful world.
For us, this wasn’t simply a recognition of the past, but a compass for the future. It affirmed what has always been at the heart of Thanksgiving Coffee: coffee as a bridge between cultures, between faiths, and between people who may never meet but are deeply connected through the choices we make every day.
Rwanda: Rebuilding Through Relationship
Dukunde Kawa Cooperative farms span ten kilometers in Rwanda’s northern hills, where over 80% of members are women. Fair Trade Certified and winners of the SCAA Sustainability Award, this cooperative produces elegant coffee through meticulous daily harvesting and processing. Farmers bring fresh cherries to central washing stations in Musasa, where they are depulped, fermented, washed, and dried on raised beds—creating a cup with natural sweetness, citric brightness, and deep cocoa notes.
Coffee Farmers sorting coffee cherries, Rwanda
Mother and coffee farmer of Dukunde Kawa Cooperative, Rwanda
Rwandan coffee growing in the hills
Overlooking the drying racks from atop a beautiful mountain view, Rwanda
Gorilla Fund Legacy
Our relationship with Rwanda began in 2004, when Co-Founder Joan Katzeff traveled there to establish her first solo international partnership with the Dian Fossey Gorilla Fund International. It was a defining moment in our history — a woman-led sourcing journey rooted in relationship, ecological responsibility, and courage.
In 2005, Co-Founder Paul Katzeff followed as part of a USAID initiative, working alongside Rwandan cooperatives to develop cupping labs and strengthen farmer-led quality. Together, Joan and Paul built a partnership that connected coffee farming, community renewal, and gorilla conservation across almost two decades.
Through this collaboration, we launched the Gorilla Fund Cause Coffee line in 2005, using Fairtrade Rwandan coffee to support the protection of mountain gorillas and the communities who share their habitat. In 2017, we expanded this legacy with Grauer’s Gorilla Coffee, made with Organic and Fairtrade beans from the Congo to support critically endangered Grauer’s gorillas.
In total, our Gorilla Fund Coffees raised $106,209 to support conservation, education, and habitat protection in Rwanda and the Congo.
This partnership reflects the heart of our ethos: a cup that protects life, uplifts communities, and strengthens the ecosystems we all share.
A December Pairing: Coffee + Cake
Featured Coffee: Rwanda Dukunde Kawa
This Rwanda Single Origin is the featured coffee of the month. It is an invitation to taste the elegance and strength of Rwandan craftsmanship. This is a coffee to slow down with. One to sip while you read, cook, or watch the morning light move across your own horizon.
- Red plum brightness
- Hibiscus and floral lift
- Honeyed sweetness
- Cocoa depth
- Clean, lingering finish
Featured Recipe: East African Coconut Cardamom Cake
A simple, beautiful cake inspired by coastal East African flavors, created to pair with Rwanda Single Origin. Best made with organic ingredients.
Serves: 8
Time: ~10 minutes prep + 35 minutes bake
Difficulty: EasyIngredients
- 1 ½ cups all-purpose flour
- 1 cup sugar
- 1 cup canned coconut milk (full-fat preferred)
- ½ cup melted butter or coconut oil
- 2 large eggs
- 1 ½ teaspoons ground cardamom
- ½ teaspoon cinnamon (optional but lovely)
- 1 teaspoon vanilla extract
- 1 teaspoon baking powder
- ½ teaspoon salt
- ½ cup unsweetened shredded coconut (for topping, optional)
Instructions
- Preheat your oven to 350°F (175°C). Grease an 8-inch round cake pan or loaf pan.
- In a large bowl, whisk together the flour, sugar, cardamom, cinnamon, baking powder, and salt.
- In a separate bowl, whisk the coconut milk, melted butter or oil, eggs, and vanilla until smooth.
- Pour the wet ingredients into the dry ingredients and stir gently until just combined. Do not overmix.
- Pour the batter into the prepared pan. If using, sprinkle shredded coconut evenly over the top.
- Bake for 30–35 minutes in a round pan (or up to 40 minutes in a loaf pan), until the top is golden and a toothpick inserted into the center comes out clean.
- Let the cake cool slightly, then slice and serve warm or at room temperature.
Enjoy a slice with a fresh cup of Rwanda Single Origin, and notice how the cardamom and coconut cradle the coffee’s brightness in a gentle, inviting way.
How to Practice Global Citizenship with Your Cup
Global citizenship can feel like a big idea, but it lives in very small, daily choices.
Here are a few simple ways to bring this theme to life:
- Brew with intention. Take a quiet moment to acknowledge the farmers, land, and hands that brought this coffee to you.
- Learn a farmer story. Visit our blog and read more about our origin partners and interfaith cooperative work.
- Share a cup. Make Rwanda coffee for a friend, neighbor, or coworker, and tell them a bit about the people behind the beans.
- Leave a review. Your feedback helps us tell farmer stories and grow support for relationship-grown coffee.
- Stay connected. Join our email list for monthly stories from origin, regenerative sourcing updates, and recipe pairings.
Every time you choose coffee that honors the people and our planet, you’re participating in a different kind of economy. An economy that is rooted in gratitude, reciprocity, and long-term relationship.
To our long-time customers and to those finding us for the first time, thank you. Your daily coffee ritual makes this work possible.
To the farmers of Rwanda: we see your courage, your craft, and your commitment to community. It is our honor to stand in partnership with you.
From our harbor in Fort Bragg to your table, may this season remind us how deeply connected we truly are, and how every choice we make can help shape a more just and compassionate world.
Not Just A Cup, But A Just Cup™
Lavender Grace is the Sustainable consultant for Thanksgiving Coffee Company
Stay in touch - we like to stay connected
Global Citizenship Through Coffee: The Bridges We Build
read more - our commitment to ethical and fair trade;
-
![Thanksgiving Coffee Wins GOLD]()

A Heartfelt Thank You From the Mendocino Coast
We are honored - and humbled - to share that Thanksgiving Coffee Company has been awarded the 2025 Readers’ Choice GOLD Award for Best Coffee in Lake & Mendocino Counties.
This one means a lot.
For more than 52 years, our roasting team has kept the fires burning here on the Fort Bragg harbor, crafting ethical, sustainable coffee as a daily practice of gratitude. To be recognized by our own community, our neighbors, and our longtime customers is the greatest award we could receive.
From everyone here on the Mendocino coast:
Thank you for your loyalty, your morning rituals, and your belief in small coastal craft. Thank you for choosing us, and standing with a small roaster with big convictions.
Not Just a Cup, But a Just Cup™.
Why This Award Matters
The Readers’ Choice Awards, presented by Mendo Lake Publishing Group, highlight local businesses chosen directly by the people who live here. There is no bigger honor than a community vote, because it reflects real relationships, real ritual, and real trust.
For Thanksgiving Coffee, this GOLD award celebrates:
- Half a century of artisan roasting on the Mendocino Coast
- Consistency of excellence across generations
- Our commitment to sustainable, ethically sourced coffee
- The legacy of Paul and Joan Katzeff, who helped build the specialty coffee movement
- You, our community that has supported us since 1972
Green Beans ready for roasting
Checking the Roast
Best Coffee Category
A Ritual of Gratitude, Crafted Daily
Every cup we roast is an expression of the values that have guided us since 1972:
- Care for the land
- Respect for the farmers
- Stewardship of craft
- Deep love for this place we call home
Your votes affirm that this work still matters.
Celebrate With Us - Brew Something Golden
if you’ve been part of our journey, raise a cup with us.
If you’re new here, welcome - we’re so glad you found your way to the Mendocino coast through your morning brew.With gratitude, always.
The Thanksgiving Coffee Team
Not Just a Cup, But A Just Cup
Lavender Grace is a Creative Consultant for Thanksgiving Coffee Company
Stay in touch - we like to stay connected
Thanksgiving Coffee Wins GOLD
read more -
![The History of Our Holiday Blend]()

A Tradition That’s Been Brewing Since 1980
Every holiday season, the air around our Mendocino roastery has filled with the rich aroma of something special: the first roast of our Holiday Blend.
Born from the coastal fog and festive spirit of Northern California, this blend has become one of our longest-running traditions, crafted each year as a toast to connection, craftsmanship, and gratitude.
Now in its forty-fourth season, Holiday Blend continues to honor its original intent: to bring people together around a cup that complements the flavors of the season and celebrates the people who grow it.
How a Seasonal Tradition Began
We have recreated this medium roast blend every year since 1980, always sourcing from the same three origins—Nicaragua, Colombia, and Sumatra.
While the components remain constant, no two years are ever exactly alike. Climate, weather patterns, and even volcanic activity shape the harvests, creating subtle shifts in flavor and aroma.
Yet through all those changes, one thing remains true: every Holiday Blend is designed to be the perfect companion to the decadent foods and sweet gatherings of the season.
Flavor Notes: Comfort, Depth & Velvet Finish
Dark chocolate greets you at first sip, followed by a gentle hint of cedar and a finishing sparkle of ripe plum.
This medium roast invites warmth on cool mornings and pairs beautifully with rich, traditional holiday fare—from spiced cakes and roasted nuts to your favorite desserts.
“Great coffee begins with gratitude - for farmers, for land, and for the craft that brings it all to life. The Holiday Blend is our yearly toast to that gratitude.”
Where It's Grown
- Colombia — Deep dark chocolate and smooth sweetness from Finca Agroberlin in the snow-peaked mountains of the Sierra Nevada de Santa Marta
- Sumatra — Earthy, cedar-like depth from the Gayo Mountains’ dense tropical forests.
- Nicaragua — Bright, lively notes from Jinotega, the heartland of coffee country—bringing balance to every cup
Together, they compose a coffee that’s both grounded and celebratory—finishing with a ripe plum sparkle and a long finish that lingers like a favorite holiday memory.
How To Brew, Pair & Share
Brewing Methods: French press for round body; pour-over or auto-drip for clarity and cocoa-cedar sweetness.
Pairings: Spiced persimmon cake, cranberry-orange loaf, or dark-chocolate sea-salt bark.
Gifting: Tuck a bag with a handwritten note and your favorite brewing tip—instant host gift.
Recipe idea: Try a simple Holiday Mocha—6 oz Holiday Blend + 1 oz dark chocolate syrup + steamed milk; dust with cinnamon and orange zest.
Persimmon Spice Cake is great with Holiday Blend
A Cup Worth Gathering Around
The Holiday Blend reflects who we are as a company: devoted to the art of roasting, committed to our farmer partners, and guided by gratitude for the land that sustains us.
It’s a seasonal reminder that great coffee is more than just flavor—it’s a story of resilience, relationship, and care.
Every bag carries forward our promise: Not Just a Cup, But a Just Cup.™
Bring the Tradition Home
Make this season’s gatherings a little warmer—with a cup that celebrates people and planet.
The History of Our Holiday Blend
read more -
![A Just Cup: The Story Behind the First Environmental Committee in Specialty Coffee]()

In the early years of specialty coffee, before “sustainability” was a familiar word, a handful of roasters and importers began to ask for more of the coffee trade. What if quality wasn’t just in the cup, but in the care behind it? What if environmental responsibility and economic fairness were part of the definition of great coffee?
A Just Cup: The Story Behind the First Environmental Committee in Specialty Coffee
This is the story of how those questions led to the creation of the first Environmental Committee within the Specialty Coffee Association of America (SCAA) - and how one small roaster on the Mendocino Coast helped spark that shift. Thanksgiving Coffee Company's co-founder Paul Katzeff was among those early voices. His journey began with a simple desire to source flavorful beans and quickly evolved into something much deeper.
Paul Katzeff in the early days with original coffee roaster
From Flavor to Justice: Nicaragua, 1985
In 1985, Paul traveled to Nicaragua at the request of a nurse who had returned from the war zone with a sample of coffee and a plea: support small-scale farmers by helping them sell their crop. At the time, Paul was President of the newly formed SCAA and still searching for “the perfect cup.”
But once he arrived in the mountains, what he witnessed changed him forever: families living without electricity or clean water, cooking in smoke-filled homes, doing their best to survive. “Coffee flavor was no longer my obsession,” Paul later said. “I came home and changed our motto from ‘In Search of the Perfect Cup’ to ‘Not Just a Cup, But a Just Cup.’”
What began as a sourcing trip became a calling.
Women cooking in Nicaragua Photo by Paul Katzeff
Roasting Coffee, Nicaragua style, 1985
Elder Grinding Coffee - photo by Paul Katzeff
Paul Playing Ball, Nicagarua 1985
Rewriting the Rules of Trade
After President Reagan imposed an embargo on Nicaragua, Paul rerouted coffee shipments through Canada, where a Fair Trade roaster helped him finish the coffee and legally import it to the U.S. He then launched one of the first cause-driven blends: Café por la Paz (Coffee for Peace), donating 25 cents from every bag to support farming cooperatives in Nicaragua.
These weren’t marketing strategies. They were moral commitments, rooted in firsthand experience and a belief that business could be a tool for justice.
“We didn’t call it sustainability,” Paul recalls. “We just did the work.”
From Observation to Action
Throughout the late 1980s and 1990s, Thanksgiving Coffee took concrete environmental action.
- We financed the planting of 75,000 shade trees in Ethiopia through Trees for the Future.
- We converted our delivery fleet to biodiesel, the first commercial fleet in California to do so.
- Our team paid attention to soil health, biodiversity, and forest preservation before there were certifications that would then require it.
The company soon began receiving awards and recognition for our work.
Thanksgiving Coffee Company and Delivery Van circa 1990's
Solidaridad Coop, Shade Grown Song Bird Coffee Farmers - Nicaragua 1996 photo by Paul Katzeff
Beyond Organics: A New Framework
In 1996, Paul presented a groundbreaking green coffee buying framework at the first Sustainability and Coffee Conference hosted by the Smithsonian. Called “Beyond Organics,” the system recognized a range of environmental and social practices: shade-grown coffee, indigenous land stewardship, cooperative participation, biodiversity protection, and more.
The idea was simple: not all progress looks the same, but every step matters.
Read Original Green Buying Criteria here
Building a Committee with a Conscience
As more members of the SCAA began asking hard questions, Paul and a handful of allies proposed forming the first Environmental Committee. It was an uphill battle.
“There was resistance,” Paul admits. “Many in the industry believed a trade association wasn’t the place for politics or activism. But we weren’t pushing politics. We were elevating values.”
That committee—eventually renamed the Sustainability Committee—brought structure, credibility, and accountability to the growing movement. It evaluated certifications, supported origin-based initiatives, and helped small brands tell honest, impactful stories.
2000: A Defining Year
When Paul chaired the SCAA’s 12th Annual Conference in San Francisco, he centered the event around three themes: Quality, Sustainability, and Social Responsibility. It marked a turning point.
During his keynote, he challenged the industry to consider the human cost of low coffee prices. He announced a USAID grant to build cupping labs in Nicaragua, giving farmers tools to taste, evaluate, and price their own coffee for the first time.
The message was clear: coffee is about people.
Paul with a Campasino and connecting with the children of Nicaragua
What We Built Together
Since then, the specialty coffee industry has changed. Terms like fair trade, carbon-neutral, and regenerative are more common. But behind those terms are decades of work from small companies like ours.
Thanksgiving Coffee:
- Supported origin cooperatives through financial transparency
- Donated to reforestation and clean water initiatives
- Converted our delivery fleet to biofuel
- Featured farmers on our packaging before it was common practice
- Advocated for certifications with rigor, not shortcuts
Why This Story Matters
As the coffee industry continues to face global challenges such as climate change, greenwashing, and pricing instability - it helps to remember where the values came from.
We share this story to honor the path we’ve walked with our partners, our customers, and our peers. We’re still learning. We’re still evolving. And we’re still committed to using coffee as a tool for possibility.
Shop the Coffees That Carry This Legacy
Paul’s Blend – Founders’ Legacy Roast
A bold, meaningful medium-dark roast named for our co-founder, honoring 50+ years of leadership in coffee and justice.Or Try the Origin Masters
These small-lot coffees are from pioneering cooperatives including: UCA Miraflor and CECOCAFEN
the co-architects of the world’s first farmer-owned cupping labs.Sold outSold outSold out
Lavender Grace is the Sustainability Consultant for Thanksgiving Coffee Company
Stay in touch - we like to stay connected
A Just Cup: The Story Behind the First Environmental Committee in Specialty Coffee
read more -
![Brewing Possibility: Our 2024 Impact Report]()

Our 2024 Impact Report
At Thanksgiving Coffee, every roast begins with a question: What really matters?
In 2024, we found answers by listening—to farmers, to customers, to our team, and to the land. The result is the most honest and grounded Impact Report (pdf) yet: a reflection of where we’ve been and where we’re headed next.
As we simplify our product line to focus on what we do best, we’re holding tight to the relationships and regenerative values that have always defined our work. That means sourcing from smallholder cooperatives, supporting ecological resilience, and roasting every bean with care and intention.
“Coffee, when done right, Is A Relationship.”
In 2024, we listened more deeply than ever:
⭐ 88.9% of our green coffee was Certified Organic
⭐ $91,529 donated to causes we care about
⭐ Verified health and income gains from clean energy investments in Uganda
⭐ Roasting with purpose for 52 years and countingOur Ongoing Commitments
We remain committed to being ethically sourced and artisan roasted, maintaining over 88% of our coffees certified Organic, and guiding all purchases by our Purchasing for a Healthier Planet criteria. (This criteria was established in 1995 and is still going strong.)
While we're retiring many of our Cause Coffees this year, a few important ones will remain and their impact continues. From restoring pollinator habitat to protecting migratory bird forests, your daily cup still fuels change where it’s needed most.
Biodiversity loss is one of the most urgent challenges of our time, and we’re proud to stand with the growers, ecologists, and educators who are working to reverse it—one forest, one garden, one farm at a time.
Past Impact Reports
Lavender Grace is the Sustainability Consultant for Thanksgiving Coffee Company
Brewing Possibility: Our 2024 Impact Report
read more -
![Delicious Peace Coffee: Honoring the Legacy, Continuing the Interfaith Journey]()

Banner: Florence Namaja Wabire, Coffee Farmer from Mirembe Kawomera, Uganda
A Cup That Carried More Than Coffee
When Paul Katzeff co-founded Thanksgiving Coffee in 1972, he carried with him the heart of a social worker who believed business could be a tool for justice. That vision led us, in the early 2000s, to a group of Jewish, Christian, and Muslim farmers in Mbale, Uganda. They called their cooperative Mirembe Kawomera—“Delicious Peace.”
For nearly two decades, we roasted their beans and shared their story. Each bag carried more than coffee; it carried proof that people of different faiths could work side by side, building better lives through collaboration.
What We Accomplished Together
With your purchases and support, Delicious Peace became more than a product—it became a movement.
- A $1 rebate per bag funded clean water filters for all 342 cooperative households, drastically reducing illness and freeing income for education and food.
- Clean Cook Stoves replaced traditional open-fire kitchens for the most vulnerable families, using one-tenth the fuel while directing smoke safely outside the home. These stoves reduced illness and burns, curbed deforestation, and became a model for climate resilience, women’s health, and rural job creation.
- Women and girls gained back hours of their days once spent collecting firewood.
- Most importantly, a community once divided grew into a living example of interfaith harmony.
For a dive deeper, the full journey is archived here:
Mirebe Kawomera, M'bale Uganda Photo by Paul Katzeff
Why Delicious Peace Coffee Is No Longer Available
We know this is disappointing news. Some of you first discovered Thanksgiving Coffee through Delicious Peace. We are grateful for every cup you brewed.
Over two decades, we built demand for this coffee from zero to 10,000 pounds a year. It wasn’t easy—the growth came through our own costly marketing of the interfaith story. But importing from Uganda required purchasing a full container, nearly 37,000 pounds. There was never a market for the remaining 27,000 pounds, so we absorbed the excess into other blends in order to keep bringing their coffee in.
Today, with a single container costing about $200,000, that model is no longer financially possible for us as a small, values-driven company. We had to rethink how we continue telling this inspirational interfaith coffee story without jeopardizing the health of our business. Rather than overextend ourselves financially and risk the integrity of our work, we chose to step back responsibly and allow the story to evolve in new ways.
The decision wasn’t easy. Delicious Peace was an extraordinary coffee grown in rich volcanic soil. But more than the flavor, it was the interfaith cooperation that made it truly special. And that is the part of the story that continues today.
Two Boys from Mirembe Kawamera peering out the window. Photo by Paul Katzeff
A New Chapter: Nabugoye Crafts
The spirit of Delicious Peace did not end when the coffee did. It found new soil, new forms, new voices.
One of the cooperative’s original founders, Sinina Namidosi, transformed her crochet skills into a thriving artisan collective. Visitors admired her headpieces—worn in both Muslim and Jewish traditions—and she began teaching other women. Soon, artisans across the community were creating beauty together across faith lines.
Living in rural Mbale meant limited market access. With seed funding from Thanksgiving Coffee and the entrepreneurial spirit of local partner John Elijah, the group registered a business, opened a bank account, and launched an online store. Today, Nabugoye Crafts ships worldwide.
👉 Visit Nabugoye Crafts
Each piece—whether a headpiece, accessory, or textile—carries the same message that once filled your cup: Jews, Christians, and Muslims working side by side, creating beauty, and sustaining their families with dignity.
No Substitution, Only Continuation
There is no true substitute for Delicious Peace. What made it extraordinary wasn’t only the beans, it was the unity behind them. That story now continues through Nabugoye Crafts. By supporting these artisans, you’re keeping the spirit of Delicious Peace alive—helping women earn income, sustain their households, and model interfaith harmony for the next generation.
Fun note: Smithsonian Folkways recording Delicious Peace: Coffee, Music and Interfaith Harmony in Uganda.
With Gratitude
To all who supported Delicious Peace over the years: thank you. You funded clean water, you stood for interfaith peace, and you proved that coffee can be a force for justice. While the coffee itself is no longer on our shelves, the story lives on—now in the hands of Ugandan women artisans whose work is as purposeful as it is beautiful.
With gratitude,
The Thanksgiving Coffee Family
Lavender Grace is the Sustainability Consultant for Thanksgiving Coffee Company
Stay in touch - we like to stay connected
Delicious Peace Coffee: Honoring the Legacy, Continuing the Interfaith Journey
read more -
![Cause Coffee Legacy Guide]()

Your Guide to Our Legacy Cause Coffees
This season, we’re making an important change to our coffee lineup, including our Cause Coffees. As we simplify our offerings, here’s how to stay connected to the causes you care about. Thank you for supporting coffees that give back.
Starting in September, we're streamlining our packaged coffee offerings. With a simplified lineup, we can focus on the blends and origins we can source consistently, roast with excellence, and deliver to you at the highest possible quality.
This means saying goodbye to a few long‑time favorites, including some of our beloved Cause Coffees.
We will continue to offer SongBird Coffees and Bee Bold Medium Coffee.
While some coffees will no longer be available in our online store, our commitment to the causes and communities they support remains as strong as ever. In many cases, we'll continue to support these causes through private-label collaborations.
Support These Causes & Find Your Next Favorite Roast
The following Cause Coffees are retiring, but the missions they support continue on. We encourage you to visit their websites and sign up for their newsletters to stay connected. Plus, explore our recommended alternative coffee roasts — and keep brewing with purpose.
Delicious Peace
Continue to support INTERFAITH UGANDA. The spirit of Delicious Peace lives on beyond coffee. One of the cooperative’s original founders, Sinina Namidosi, transformed her crochet skills into a thriving artisan collective: Nabugoye Crafts.
- For Medium Roast → Try Rwanda Single Origin or Bee Bold Medium
- For Dark Roast → Try Mendocino Vienna or Songbird Colombian
Bee Bold Alliance *
Continue to support PROTECTING POLLINATORS.
- For Dark Roast → Try Mendocino Vienna or Songbird Colombian
- For Decaf → Try Royal Decaf or Songbird Decaf
* Note that Bee Bold Medium Roast is still available.
Save Our Wolves
Continue to support DEFENDERS OF WILDLIFE
- For Medium Roast → Try Paul’s Blend or Songbird Nicaraguan
- For Dark Roast → Try Mendocino Vienna
or Songbird Colombian - For Decaf → Try Royal Decaf or Songbird Decaf
Mara Elephant Project
Continue to support WILDLIFE CONSERVATION IN KENYA
- For Light Roast → Try Kenya - Nyeri Peaberry or Songbird Nicaraguan
- For Dark Roast → Try Mendocino Vienna or Songbird Colombian
- For Decaf → Try Royal Decaf or Songbird Decaf
Baby Rhino Rescue
Continue to support PROTECTING ENDAGERED SPECIES
- For Medium Roast → Try Paul’s Blend or Songbird Nicaraguan
- For Dark Roast → Try Mendocino Vienna or Songbird Colombian
- For Decaf → Try Royal Decaf or Songbird Decaf
Mendocino Land Trust
Continue to support LOCAL CONSERVATION EFFORTS
- For Medium Roast → Try Paul’s Blend or Songbird Nicaraguan
- For Dark Roast → Try Mendocino Vienna or Songbird Colombian
- For Decaf → Try Royal Decaf or Songbird Decaf
Wild Grounds
Continue to support AMERICAN WILD HORSE CAMPAIGN
- For Medium Roast → Try Paul’s Blend or Songbird Nicaraguan
- For Dark Roast →Try Mendocino Vienna or Songbird Colombian
- For Decaf → Try Royal Decaf or Songbird Decaf
Point Cabrillo Lightkeepers
Continue to support COASTAL HERITAGE
- For Medium Roast → Try Paul’s Blend or Songbird Nicaraguan
- For Dark Roast → Try Mendocino Vienna or Songbird Colombian
- For Decaf → Try Royal Decaf or Songbird Decaf
Redwood Forest Reserve
Continue to support ANCIENT FOREST PRESERVATION
- For Medium Roast → Try Paul’s Blend or Songbird Nicaraguan
- For Dark Roast → Try Mendocino Vienna or Songbird Colombian
- For Decaf → Try Royal Decaf or Songbird Decaf
Continue Supporting Causes You Love
To help the causes behind these beloved coffees continue to thrive, we encourage you to:
- Visit the cause’s website and sign up for their newsletter.
- Purchase their private label coffee directly, where available.
- Follow their work on social media and share their story.
Thank you for continuing to support these causes—and our ongoing cause coffees below.
our ongoing Cause Coffees
Join us in our evolution
Lavender Grace is the Sustainability Consultant for Thanksgiving Coffee Company
Cause Coffee Legacy Guide
read more -
![Rwanda Resilience in Every Cup: Coffee with a Climate Impact]()

Taste the Bright Future of Coffee
Our Rwanda Single Origin offers more than just incredible flavor—it’s a coffee that supports community resilience. Grown at high elevations in Musasa, Rwanda, by the Dukunde Kawa Cooperative.This medium roast delivers:- Tasting Notes: Vibrant citrus, delicate florals, and a smooth honey finish
- Mouthfeel: Silky and refreshing, with a bright, clean finish
- Perfect for: Pour over, drip, or French press—ideal for your morning clarity ritual
Rwanda Single Origin Coffee with citrus, floral, and honey tasting notes from Dukunde Kawa.
Why Dukunde Kawa Coffee Matters
Dukunde Kawa means “Let’s love coffee”—a name that reflects their commitment to people, planet, and flavor. This Rwandan cooperative is internationally recognized for combining exceptional quality with climate action.
Here's what climate resilience in action looks like:- 2,500+ clean cook stoves installed, reducing wood use by 70%
- Tree nurseries restoring biodiversity and combating soil erosion
- Women’s leadership with 80% women participation at the Ruli washing station
Every bag of Rwanda Single Origin supports these impactful programs, making every cup an act of regeneration and reciprocity.
Sources: Dukunde Kawa Sustainability Programs and Thanksgiving Coffee Dukunde Kawa Story
Rwanda Coffee Farm
Brew a Better Morning, Support a Better Future
Every time you brew Rwanda Single Origin, you:- Support healthier homes with clean cook stove initiatives
- Restore forests and farms through reforestation efforts
- Empower women farmers, nurturing local leadership
Recipe: Cold Brew for Summer Brightness
Show off the bright notes of Rwanda Single Origin with this easy cold brew:- Coarse grind 1 cup of beans
- Steep in 4 cups of filtered water for 12-14 hours
- Serve over ice with a twist of fresh orange peel
Refreshing, vibrant, and perfect for a summer coffee ritual.
Explore More Flavor Stories
Lavender Grace is the Sustainable Ecology Advocate for Thanksgiving Coffee Company
Stay in touch - we like to stay connected
Rwanda Resilience in Every Cup: Coffee with a Climate Impact
read more -
![Simplifying to Serve You Better: A New Chapter in Our Coffee Journey]()

Simplifying to Serve You
The coffee landscape is dramatically different than it was when we began this journey 53 years ago.
In those early days, we built our lineup coffee by coffee — adding blends and single origins as new beans became available and relationships grew. For decades, harvests were plentiful and sourcing was straightforward.
Today, the world of coffee is evolving. Climate shifts, supply chain realities, and changing customer preferences mean we need to be as thoughtful and resourceful as possible to keep doing what we do best: bringing you exceptional coffee with integrity.
Change for the Better
We're streamlining our packaged coffee offerings, starting in September. With a simplified lineup of coffees, we'll focus on the blends and origins we can source consistently, roast with excellence, and deliver to you at the highest possible quality.
By simplifying our offerings, we will:
- Deepen our support for the farmers we work with through more focused purchasing.
- Maintain freshness and quality in every cup we roast.
- Stay nimble in a changing coffee landscape, so we can continue being your favorite coffee company for years to come.
What This Means For You
We know change isn’t always easy — especially when it means saying goodbye to a favorite. But change also creates space for something new.
- Nearly every retiring coffee has a suggested alternative: matched for flavor, roast level, and story.
- All coffees will remain listed on our website, so you can easily find info about alternatives or select a bulk purchase option.
- Cause Coffees: For special details on replacements and recommendations, visit our Cause Coffee page.
- Bulk options: Many coffees will still be available in 5 lb bags, even if they’re not sold in retail-size packaging. We’re happy to share our best practices for keeping coffee fresh in larger quantities.
Find Your Next Favorite Cup
We know you might be wondering, “What will replace my favorite?”
Here’s the list of our retiring coffees with the roasts we recommend in their place — each one carefully matched for flavor, roast, and story.
- ⏳ Albion River Inn Blend → Try Paul’s Blend
- ⏳ Beaujolais Blend → Try Old Town French
- ⏳ Costa Rica → Try Peru
- ⏳ Delicious Peace Dark → Try Mendocino Vienna
- ⏳Delicious Peace Medium → Try Rwanda
- ⏳ Guatemala → Try Song Bird Guatemalan
- ⏳ Hazelnut → Available in 5lb bag
- ⏳ MacCallum House Blend → Try Beaujolais FTO
- ⏳ Mocha Java FTO → Try Mocha Java Classic
- ⏳ Nicaragua → Try Song Bird Nicaragua
- ⏳ Vienna → Try Mendocino Vienna
- ⏳For Cause Coffees →See Cause Coffee Guide
Our Commitment Remains the Same
For over five decades, we’ve been devoted to ethically sourced, artisan roasted coffee — and that will never change. Every decision we make is rooted in our mission:
- Source with integrity
- Roast with care
- Honor the stories behind every coffee bean
Thank you for growing with us, embracing new favorites, and sharing our belief that coffee is more than a drink. It's a daily connection to people, to our planet, and our sense of purpose.
With gratitude since 1972,
The Thanksgiving Coffee Team
You might be interested in...
Sold outSold outSold out
Lavender Grace is the sustainability consultant for Thanksgiving Coffee Company
Stay in touch - we like to stay connected
Simplifying to Serve You Better: A New Chapter in Our Coffee Journey
read more -
![B Corp Coffee Partnerships: How Conscious Collaboration Drives Environmental Impact]()

B Corp Coffee Partnerships: Conscious Collaboration
Every first Saturday in July, thousands of people gather at Fort Bragg’s Noyo Harbor for the World's Largest Salmon BBQ—a celebration that’s both festive and fiercely focused on restoration. It's a paradox we embrace: honoring nature by gathering in its name.
This spirit of collective care mirrors how Thanksgiving Coffee approaches sustainable business relationships—especially through our growing network of fellow B Corps.
Grove Collaboratives First B Corp Coffee
When Grove Collaborative chose Thanksgiving Coffee as their very first coffee partner, it marked a significant milestone in our 50+ year journey since founding Thanksgiving Coffee in 1972.
This wasn't just another retail partnership—it represented Grove's recognition of our commitment to ethical coffee sourcing and regenerative business practices.
Grove features our coffee with the tagline: "This bag carries more than artisan coffee—it's a vessel of hope, connection, and giving thanks to the Earth." This partnership demonstrates how aligned values create natural B Corp collaborations that extend far beyond traditional business transactions.
Brewing Local Impact with North Coast Brewing Company
North Coast Brewing Company, our neighbor in Fort Bragg, has been independent since 1988. They have built their reputation on quality craft brewing while maintaining strong community ties.
At the 2024 World's Largest Salmon BBQ, their craft beer complemented our artisan coffee, creating a complete North Coast experience that spotlighted the power of place-based partnership.
Raising the Bar with Bonterra Organic Estates
Our partnership with Bonterra Organic Estates, America's #1 organic winery, represents the gold standard of regenerative agriculture collaboration. They've achieved Regenerative Organic Certification, TRUE Zero Waste status, and B Corp certification—proving that excellence and environmental stewardship flourish together.
Salmon Restoration Through Conscious Commerce
The World's Largest Salmon BBQ demonstrates how conscious business partnerships create measurable environmental impact.
Here are the 2024 Results:
- $60,000 raised for salmon restoration
- $40,000 donated to Trout Unlimited's North Coast Coho Project
- 2,500 attendees supporting sustainable practices
According to the National Oceanic and Atmospheric Administration, these restoration efforts have resulted in over 15,000 adult coho salmon returning to spawn in Mendocino Coast rivers—in waters that hadn't seen coho salmon for 70 years.
"North Coast Coho Project" in the Noyo River watershed when completed will provide access to 2.6 miles of upstream salmon habitat for spawning and rearing.
Building Systems Evolution
For over 50 years, Thanksgiving Coffee has operated on the principle that coffee is a medium for connection and positive change. Our B Corp partnerships have shown us how this philosophy extends beyond our coffee supply chain to encompass the entire ecosystem of conscious commerce.
When North Coast Brewing brings their craft beer to the Salmon BBQ, when Bonterra contributes their organic wines, when Grove Collaborative features our coffee as a vessel of hope—we create something none of us could achieve alone.
We're not just selling products; we're building a network of businesses that demonstrate another way forward.
The Ripple Effects of Regenerative Partnerships
The numbers tell part of our story, but the deeper narrative is about amplified impact. Every cup of Thanksgiving Coffee that reaches Grove's customers, every moment of connection at the Salmon BBQ, every dollar raised for stream restoration—these represent the ripple effects of partnerships that prioritize shared prosperity over individual gain.
The salmon returning to Mendocino Coast rivers after 70 years remind us that restoration is possible through collaborative effort.
Similarly, our growing B Corp network demonstrates that business can be a force for healing rather than harm.
Looking Ahead: A Business Practice of Care
These partnerships didn't emerge from market analysis—they grew from shared values and mutual recognition of what's possible when businesses align their success with the world's wellbeing. Grove chose us because our story resonates with their mission. North Coast Brewing and Bonterra partner with us because we share commitment to place and values.
Together, we create impact greater than the sum of our parts. We've learned that the company we keep shapes not just our success, but our contribution to a more sustainable world. In choosing B Corp partners who share our commitment to restoration and regeneration, we've proven that business can be a practice of care—for the earth, communities, and the future we're creating together.
Lavender Grace is the Sustainability Consultant for Thanksgiving Coffee Company
Stay in touch - we like to stay connected
B Corp Coffee Partnerships: How Conscious Collaboration Drives Environmental Impact
read more -
![The Cupping Lab Revolution: How Thanksgiving Coffee Changed Coffee Forever]()

The Cupping Lab Revolution: How Thanksgiving Coffee Changed Coffee Forever
Cupping Coffee , Nicaragua
It began with a journey to Nicaragua in the 1980s. Paul Katzeff, a former social worker and co-founder of Thanksgiving Coffee, traveled to listen to the farmers. Paul had the tools and vision to create a new way forward for the coffee world.
In those war-torn hills, Paul came face to face with the quiet strength of farmers who had survived conflict, drought, and poverty. What he discovered would transform his understanding of coffee forever.
What Paul saw was that coffee could be more than just a product. It could become a tool for restoring dignity, building solidarity, and giving voice to those who had been left out of their own story.
Nicaruaguan Coffee Farmers coming home, photo by Paul Katzeff
Coffee as a Bridge Between Worlds
Paul's 1985 trip to Nicaragua occurred during the U.S.-backed Contra War—a time of immense hardship and tension. What he witnessed moved him deeply: farmers cultivating resilience amid unimaginable challenges. Meeting with PRODECOOP, one of the earliest farmer cooperatives, he understood that meaningful change would require more than charity. It would take genuine partnership.
This experience birthed a vision for direct trade built on empathy and transparency. Paul saw coffee as more than a commodity—he saw it as a bridge connecting people across borders, across struggles, and across systems built to exclude the voices of those who grow the coffee we love.
Coffee Processing Nicaragua
Preparing coffee to dry - Nicaragua
Roasting coffee in traditional oven at the Lopado Farm, Nicaragua, photo by Paul Katzeff
Grinding coffee in traditional outdoor style, photo by Paul Katzeff
A Revolution Born from Relationship
Years later, in 2001, Paul's vision took physical form when Thanksgiving Coffee helped create the world's first farmer-owned cupping labs. It started with a simple question:
What if those who grow the coffee were also the ones to taste it first?
That question sparked a revolution—and in partnership with our co-ops like UCA MIRAFLOR and CECOCAFEN, it redefined not just how coffee is evaluated, but who gets to define its value.
This work began with trust.
When Thanksgiving Coffee first partnered with these cooperatives, they were communities rising from hardship with their own vision. Families were replanting forests, rebuilding homes, and forming cooperatives that prioritized not only trade, but democracy, biodiversity, and food sovereignty.
Frank Lanzas Family
Fernandito Family
Fernando Beneficio
Maria Elena
As field researcher Christopher Bacon wrote:
"This is a story of reconstruction and resistance... of families working together to regenerate their communities, reclaim the land, and build new institutions of democratic governance."
In these post-war communities, farmers didn't just return to the land—they reimagined its future. By placing cupping labs in their hands, Thanksgiving Coffee wasn't introducing a new tool—they were honoring a movement already in motion.
Redefining the Waves: How Cupping Labs Transformed Coffee Culture
The history of specialty coffee is often described in "waves." The First Wave brought coffee to the masses. The Second Wave introduced espresso culture and coffee as an experience.
But it was the Third Wave—focused on origin, transparency, and craft—that truly began to value the farmer's role. And it was here that Thanksgiving Coffee's cupping labs created their most profound impact.
The Coffee Cuppers Manifesto, by Paul Katzeff 2001
"The $300,000 enabled 9 coops to build their labs and be trained as cuppers by me using SCAA scoring forms. It is one thing to have a lab but another thing to know how to use it. Training was essential. "
- Paul KatzeffIn 1999, when most coffee buyers still made quality decisions without farmer input, Thanksgiving Coffee proposed something radical: building professional cupping labs directly within producer cooperatives in Nicaragua. With a $300,000 USAID contract and decades of field experience, these labs were constructed in 2000, becoming the world's first farmer-owned and operated cupping facilities.
The innovation couldn't have been better timed. As Third Wave coffee culture was gaining momentum in the early 2000s with its focus on single-origin beans and transparent sourcing, these cupping labs equipped farmers to meet this new demand with unprecedented precision.
Suddenly, farmers could:
- Taste and analyze their own coffee before it left the farm
- Create detailed flavor profiles previously only done by importers
- Develop specific micro-lots for specialty markets
- Experiment with processing methods that enhanced quality
- Engage in price negotiations based on verifiable quality data
By 2001, the Cuppers Manifesto was born—a bilingual manual distributed to 10,000 Nicaraguan farmers and later shared with 8,000 producers in Colombia by the Colombian Coffee Federation.
Coffee Processing Nicaragua, photo by Paul Katzeff
From Third Wave to Fourth: Farmers as Flavor Artists
What began as a Third Wave innovation has evolved into something even more profound—what many now call the "Fourth Wave" of coffee, where farmers themselves have become recognized artists of flavor creation.
Today's most celebrated coffees often feature not just the region or farm name, but specific processing techniques developed and perfected by individual farmers—techniques like honey processing, extended fermentation, and anaerobic processing that create distinctive flavor profiles impossible to achieve through roasting alone.
This transition—from farmers as anonymous producers to farmers as named innovators—can be traced directly back to those first cupping labs. When farmers gained the ability to taste, evaluate, and experiment with their own coffee, they unleashed a wave of innovation that continues to transform the industry.
As Paul shared in a later interview:
"Coffee is about people. If you take care of the people, the coffee takes care of itself."
These labs didn't just reflect a shift in coffee culture—they helped create it. From these humble beginnings in rural Nicaragua grew the foundations of today's artisan coffee movement, where quality and value begin at the source and rise through shared craftsmanship.
UCA Miraflor Cooperative, 2023 Nicaragua
Hermanez Montenegro Family with drying coffee behind, photo by Paul Katzeff
A Legacy You Can Taste
SongBird Nicaraguan, Medium Roast
From UCA MIRAFLOR, this coffee represents the pinnacle of farmer-led quality development.
Bird Friendly certified, it supports both sustainable farming and migratory bird habitat.
Tasting Notes: Mango, nutty, chocolate
Miel de Cajamarca, Light Roast
From CENFROCAFE, Peru. Named for the honey-processing techniques refined in origin cupping labs.
This coffee showcases the artisan experimentation that defines Fourth Wave coffee.
Tasting Notes: Honey, papaya, milk chocolate
Join the Revolution in Your Cup
The Cupping Lab Revolution was more than the technology of tasting coffee. It was—and still is—about relationship, repair, and reclaiming the right to define what coffee can be.
Every cup of Thanksgiving Coffee connects you to this ongoing story of transformation—from Third Wave transparency to Fourth Wave farmer artisanship. It's an invitation to participate in a more equitable, relationship-based trade model that honors both the product and its producers.
It is about following a path with heart to let it guide you to be in good relationship with life and the world.
The Cupping Legacy continues - on the left, CEO Jonah Katzeff - on the right, Co-Founder and Board President Paul Katzeff of Thanksgiving Coffee Company
The Way
"The way to great coffee flavor is not direct.
The path must be traveled
with great care and attention.
The way becomes a path, the path a road,
and then, magically, the road becomes a highway
that leads to people who cultivate the land on which the coffee derives its special flavor.
How does one find the path? Through caring.
One does not search so much for the road that leads to the tree, as for the road that leads to the heart.
This is the secret."
Paul Katzeff
Co-founder, Thanksgiving Coffee Company
Lavender Grace is the Sustainability Consultant for Thanksgiving Coffee Company.
Stay in touch - we like to stay connected
The Cupping Lab Revolution: How Thanksgiving Coffee Changed Coffee Forever
read more -
![Brewing Hope: A Story of Bees, Coffee, and Connection]()

The Regenerative Connection: How Bees and Coffee Create Sustainable Ecosystems
For over half a century, Thanksgiving Coffee Company has been more than just a coffee roaster. We are storytellers, dreamers, and guardians of the delicate web of life that connects us all, witnessing the intricate dance between human intention and nature's resilience.
Imagine a single bee, wings humming against the morning light, moving from flower to flower. This tiny creature carries more than pollen—it carries the future of our food systems, our ecosystems, our very survival.
Our Bee Bold Coffee is born from a simple yet profound understanding: every living thing is interconnected, and our choices in regenerative coffee cultivation matter deeply to our planet's health.
Bee on coffee flowers
The Dance of Survival
The story of our planet's pollinators is a complex narrative of challenge and hope. We know that Bee populations are declining, native species are disappearing, and our food systems exist in a precarious balance. These are not statistics—they are a call to action, an invitation to reimagine our relationship with our natural world.
At Thanksgiving Coffee Company, we've learned that meaningful change requires more than good intentions. It demands commitment, innovation, and a willingness to work alongside nature's own wisdom. The Bee Bold Alliance embodies our most thoughtful commitment to this challenge—a holistic approach that weaves together traditional ecological knowledge, innovative research, community-driven insight, and technologies that listen to the earth.
Local Pomo and Native Tribes gathered in traditional regalia dancing for the forest and the health of Mother Earth.
Left to Right: Planting pollinator garden in Westport, Making Pollinator Seed Balls, Bee RYL Production Team filming Forest Grandmothers on Coyote Valley Pomo Reservation . Learn More
Rolling Up Our Sleeves
Our mission goes far beyond a simple cup of coffee. We know that talking isn't enough. So we're doing the work—connecting with farmers, supporting indigenous communities, and building real solutions from the ground up. The Bee Bold Alliance is our commitment to practical, meaningful change. We are actively:
- Supporting regenerative agriculture
- Amplifying traditional ecological knowledge
- Investing in youth environmental education
- Creating tangible pathways for ecosystem restoration
We are learning by doing and we are growing our understanding as we collaborate for community wellbeing. So many of us have forgotten what it means to be in community, working together. This network is exactly about that - the evolution of growing healthy together.
Flower full of Pollinators
Ripe Heirloom Apples from Paul's Orchard on Thanksgiving Coffee Company's 3 acre Polliantor Protected Zone
Your Morning Ritual, Planetary Impact
Becoming a Pollinator Protector isn't complicated. We offer some simple choices: choosing Bee Bold Coffee, planting flowers that welcome bees, learning about local ecosystems, and sharing a story of hope. Each of us has the power to create change, to nurture the intricate connections that sustain life on our planet.
"What I absolutely LOVE is that it's actually doing something good for the planet. I appreciate companies that are in it for more than just profit!" - Lester, Coffee Lover from Ohio
Small Actions, Big Changes
Want to become a Pollinator Protector? Here's how:
- Choose Bee Bold Coffee
- Plant bee-friendly flowers in your garden
- Learn about local ecosystems
- Share the story - Let us know how your garden changes once the bees know they are welcomed.
Let's Brew Change Together
With every cup, we're cultivating resilience. We're reimagining what's possible when communities, farmers, and nature work in harmony. This is more than coffee—it's a living, breathing movement of hope.
Your choice matters. Your morning brew becomes a catalyst for transformation.
Are you ready to grow something extraordinary?
Thanksgiving Coffee Company - Not Just A Cup, But A Just Cup!
Lavender Grace is the Sustainable Consultant for Thanksgiving Coffee Company.
Stay in touch - we like to stay connected
Brewing Hope: A Story of Bees, Coffee, and Connection
read more -
![Women Powering Change: SOPPEXCCA's Revolutionary Approach to Economic Justice in Coffee]()

The Story Of SOPPEXCCA: Empowerment Through Coffee
In the verdant highlands of Jinotega, Nicaragua, a revolutionary approach to gender equity is transforming the coffee industry. Led by the visionary Fátima Ismael, SOPPEXCCA cooperative operates on a powerful belief: "Women's independence can only be achieved through economic autonomy and awareness."
"This groundbreaking initiative doesn't just produce exceptional coffee – it creates a model for sustainable economic justice." – Thanksgiving Coffee Company
What makes this partnership unique is SOPPEXCCA's pioneering recognition of women's traditionally invisible contributions to coffee production. This approach addresses a global challenge documented extensively by international organizations including the United Nations.
Fátima Ismael, SOPPEXCCA'S General Manager
The $40,000 Unpaid Work Fund: Valuing Invisible Labor
Since 2013, Thanksgiving Coffee Company has committed an additional $0.10 per pound of green coffee purchased from SOPPEXCCA – specifically allocated to recognize women's unpaid work. This initiative has now generated over $40,000 supporting women's economic empowerment.
The Global Context of Unpaid Labor
According to UN Women research:
- Unpaid care work is essential to functioning economies but often goes uncounted and unrecognized
- Women—particularly from low-income, migrant, and racialized groups—perform more than three-quarters of unpaid care and domestic work globally
- If women's unpaid work were assigned monetary value, it would exceed up to 40% of GDP in some countries
Measurable Impact in Nicaragua
The SOPPEXCCA initiative has created transformative changes for women:
- Improved relationships among women in rural communities
- Increased active participation in economic decision-making processes
- Development of creative potential within family economies
- Financial independence through personal savings accounts
- Growing cooperative membership among women
"8 March ... Day of commemoration and new commitments for a world of equality, equity and respect .. Greetings female producers, friends and companions who have been with this organization on their way that has not been easy but together we have overcome a thousand adversities and will continue to be fighting ..." Soppexcca
Woman Farmers of Soppexcca Cooperative - Jinotego, Nicaragua
Environmental Stewardship Meets Social Justice
Shade Grown Coffee: Critical Habitat for Migratory Songbirds
SOPPEXCCA's commitment extends beyond economic justice. Their shade-grown cultivation methods create essential winter habitats for migratory songbirds, demonstrating how sustainable agriculture directly contributes to biodiversity conservation.
"When you choose SOPPEXCCA coffee, you're supporting both women's empowerment and environmental stewardship – values at the heart of Thanksgiving Coffee Company."
Woman Farmers from the Soppexxcca Cooperative - Jinotega, Nicaragua
The Economic Impact Of Ethical Investment
UN Women's research reveals that investing in care infrastructure creates three times more jobs than equivalent investment in construction, with 70-90% of these jobs benefiting women.
The SOPPEXCCA fund represents precisely this kind of strategic investment.
Read about our support for the women of Soppexcca:
"Recognizing the Value of Womens Unpaid Work".
Celebrate the Women Coffee Farmers of Soppexcca
Try this delicious coffee and support a more balanced and just economy for the women of Soppexcca.
Lavender Grace is the Sustainability Consultant for Thanksgiving Coffee Company.
Women Powering Change: SOPPEXCCA's Revolutionary Approach to Economic Justice in Coffee
read more -
![Love in Every Origin: A 20-Year Journey with Mahina Mele Farm]()

Love in Every Origin: A 20-Year Journey with Mahina Mele Farm
At Mahina Mele Farm, coffee cherries ripen while Jason plays bass music and Kollette creates healing skincare from their macadamia nuts. For twenty years, we've watched this 60-acre Hawaiian farm grow into something truly special – not just a place that grows coffee, but a living example of creative, earth-friendly farming.
Since 2006, Thanksgiving Coffee Company and Mahina Mele Farm have built a partnership as rich as the coffee they grow. When the Stiths arrived on Hawaii's Big Island in 2005, they weren't just buying land – they were starting a new way of living that respects nature.
Kolletee Stith with Ripe Kona Coffee Trees
Creative Spirits in Farming
Their approach blends creativity with farming in beautiful ways. Jason, who plays bass in local bands like Lip Service, brings that same creative energy to growing coffee. Kollette takes their organic macadamia nuts and transforms them into Pure Mana Hawaii skincare products that capture the essence of their land. These aren't side projects – they show how deeply the Stiths care about using every gift from their farm.
Our partnership goes beyond just buying coffee. We've supported their:
- Earth-Friendly Vision: Helping a farm that works to restore natural systems
- Creative Farming: Celebrating how growing food can connect with art and new ideas
- Community Bonds: Connecting coffee lovers directly to the farmers who grow their beans
Before Hawaii, Jason and Kollette were Peace Corps volunteers helping farmers in El Salvador. Now their 60-acre farm grows both coffee and macadamia nuts while nurturing the land around them.
Double Rainbow above the Stith family home on Mahina Mele Farms in Kona, Hawaii
Overcoming Challenges
The journey hasn't been without problems. When coffee rust disease finally reached Hawaii – the last place on Earth that didn't have it – the Stiths found natural solutions using organic treatments that help plants fight back. When their 70-year-old macadamia trees started dying from root rot, they researched sustainable answers while planning for the future. This resilience reflects the volcanic landscape itself – finding ways to thrive in challenging conditions.
Kona coffee blossoms
Ripe Kona Coffee getting picked
Kona coffee tree buds
As we celebrate two decades together, we're not just marking time. We're honoring a shared belief that every choice—from the way we farm to the products we create—can be an act of love for our planet.
Kolette Stith and Sue Mandini are the minds behind Pure Mana Hawai‘i, a macadamia nut oil-based skincare line. PHOTO COURTESY PURE MANA
Farming in Harmony with Nature
Walking through Mahina Mele Farm shows you their thoughtful approach to agriculture. Coffee trees grow alongside avocado trees that provide natural shade. African tulips and Ice cream bean trees add nitrogen to the soil naturally. Bananas, papayas, and healing Noni plants create a diverse ecosystem where everything supports each other.
Their coffee tastes of the volcanic soils and careful growing methods. When you brew Mahina Mele coffee, you can taste hints of brown sugar, milk chocolate, citrus fruit, and hazelnut – flavors that come from a farm where intention meets innovation.
One of the many Macadamia Nut trees on the Mahina Mele Farm supporting with valuable shade for coffee and delicious organic Mac Nuts
A Taste of Hawaiian Creativity
When you drink their coffee, you're joining this ongoing story. Each cup connects you to Hawaiian volcanic soil, to farming that protects the Earth, to Jason's music and Kollette's healing creations.
As we celebrate twenty years together, we're not just marking time. We're celebrating the belief that every choice – from how we grow coffee to what we create – can be an act of love for our planet.
We invite you to raise your cup and taste the difference that mindful farming makes. Experience coffee grown with creativity, care, and deep respect for the land – because at Mahina Mele Farm, love truly is in every origin.
Organic Kona coffee drying on the patio
Lilies blossoming in the shade on Mahina Mele Farm
Stith family from Mahina Mele farms
Sold outSold out
Lavender Grace is the Sustainabiity Consultant for Thanksgiving Coffee Company
Stay in touch - we like to stay connected
Love in Every Origin: A 20-Year Journey with Mahina Mele Farm
read more -
![South Harbor Sourdough & Resilient Roast]()

Bread Meets Coffee to Build Community
This is the kind of story that only happens (I believe) in small towns. It starts with Thanksgiving Coffee being an involved community business. The next phase is a remarkable Chief of Police from our town of Fort Bragg, CA. - Neil Cervenka - who thinks that you can't "arrest your way" out of all problems. Smart thinking! And there is more...
Add a small town, home based business called South Harbor Sourdough... They discovered the program and asked if they could bake a bread using the Resilient Roast. We connected them with the FBPD so they could help popularize the coffee... and it is delicious!
This is just another reason why we love living in a small town: creative thinking, creative baking, and "Not Just A Cup, But A Just Cup!"
Want to get involved?
You can order your Resilient Roast Sourdough at southharborsourdough.comand you can learn more about Project Right Now at https://www.facebook.com/FortBraggPD/.
South Harbor Sourdough & Resilient Roast
read more -
![Challenges for Specialty Coffee in 2025]()

This past year of 2024, the Specialty Coffee industry has faced a storm of challenges that have left businesses of all sizes grappling for stability. As coffee prices surged to historically high levels, the delicate balance of supply and demand was thrown into disarray, creating what many industry insiders are calling a “challenging operating environment.”
Weather and Coffee
The reasons behind this spike in pricing are multifaceted. For starters, climate change has emerged as a significant disruptor. Coffee crops are particularly sensitive to temperature fluctuations and extreme weather events. Many coffee-growing regions have reported erratic weather patterns, including droughts and excessive rainfall, which have heavily impacted yield and quality. Growers in Brazil, Vietnam, and Colombia, who make up around 70% of production, have faced extremes linked to the El Niño climate pattern, which had significant impacts on the first half of 2024. read more
Changes in Regulations
As farmers struggle to cope with these unpredictable weather conditions, the supply of high-quality beans has diminished, pushing prices even higher. Compounding this issue are new regulations that have emerged globally, such as the European Union Deforestation Regulation (EUDR). These regulations, aimed at promoting sustainability and combatting deforestation, while commendable, have added layers of complexity for coffee businesses. Compliance requires careful tracking and documentation, which translates to increased operational costs. But the EUDR has been delayed by every possible legal tactic, including the argument of how to define the word "forest." read more
Demand Outpacing Supply
For small roasters and coffee shops, the burden of higher costs can be particularly heavy, and many are now forced to pass these challenges on to consumers. This comes at a time when coffee consumption outside the home has reached its highest level since January 2020, according to the latest edition of the United States National Coffee Association‘s biannual consumer trends report. 36% of people who said they drank coffee within the past day did so “out of home” (i.e., in a coffee shop, cafe, office, etc.), so the pressure is firmly on the shoulders of small businesses to figure out the best course to survival.
Big Coffee Keeps Getting Bigger
Companies that were once small businesses have grown to where their expansion is now fueled by acquisition. For example, JDE Peet's acquired Caribou Coffee in a 260-million-dollar transaction. From humble beginnings, Peet's now claims to serve 4,100 cups of coffee (or tea) per second. The National Coffee Association reported that coffee consumption has topped 2 billion dollars per day in the US alone.
No One Is Winning
Unlike other industrial changes, there is neither a winner or 'bad guy' in this current coffee scenario. Yes, prices are higher, but the farmers aren't winning because they have less crops to sell so their income isn't rising. Coffee traders are getting caught in volatile markets, so their contracts are often turning into losses when prices exceed negotiated purchase rates. Small roasters and coffee shops are the final frontier to the consumers who can't understand why the prices they have been paying are ever increasing.
Thanksgiving Coffee is positioned to Withstand the waves
Because of our long term relationships with our innovative farmer cooperatives and producer partners, Thanksgiving Coffee Company is built to withstand many of the challenges brought on by changing market forces. We are as secure as we can be with our sourcing. However, weather impacts on harvest, transportation costs, and political impacts will continue to have influence over our prices. We have always paid our partners a premium for their best beans and that is why you keep coming back to us for the best cup possible. We will continue to do our best to get you the best beans - sourced ethically and artisan roasted - for your cup.
Additional Reading:
Roast Magazine: What is the Price of Coffee?
Reuters: Coffee Prices Surge
New York Times: Coffee Prices Are at a 50-Year High. Producers Aren’t Celebrating
Challenges for Specialty Coffee in 2025
read more -
![Ethically Sourced, Artisan Roasted]()

Ethically Sourced, Artisan Roasted:
Crafting exceptional coffee experiences since 1972 through sustainable partnerships and masterful roasting
For over 50 years, we've pioneered sustainable coffee sourcing while perfecting the art of small-batch roasting. Every bean tells a story of environmental stewardship, farmer empowerment, and uncompromising quality.
Global Partners
From Nicaragua's misty mountains to Rwanda's vibrant highlands, our decades-long partnerships with farming communities ensure exceptional coffee while promoting sustainable practices.
Environmental Leadership
From pioneering shade-grown certification to planting over 82,800 trees, our commitment to environmental stewardship sets industry standards.
Artisan Roasting
Each small batch is carefully roasted to perfection, bringing out the unique character of every origin while ensuring consistent, exceptional quality.
Farmer Empowerment
Through innovative programs like our cupping labs and Farmers Thriving Index, we ensure our partners thrive while producing exceptional coffee.
Recognition for Excellence
Honoring Exceptional Craft: A Lifetime of Roasting Mastery
Roaster of the year
good food awards
Honors Superior Taste with Commitment to Social and Environmental Justice
+ Multiple 90+ Reviews
Our Partner Network
Our multi-generational partnerships with farm communities stretch back decades, cultivating relationships as carefully as we roast our award-winning coffee beans
Corrales Family
25+ years of partnership in sustainable coffee cultivation and community development
- THIRD-GENERATION FAMILY RELATIONSHIP - LEADERS IN SHADE-GROWN CULTIVATION - CERTIFIED BIODYNAMIC AND ORGANIC PRACTICES - PIONEERS IN REGENERATIVE FARMING
CECOCAFEN
25+ years of partnership in sustainable coffee cultivation and community development
- CUPPING LAB PROJECT PIONEERS - COMMUNITY-DRIVEN COOPERATIVE - MULTI-GENERATIONAL FARMING EXPERTISE
Guaya'b Cooperative
25+ years of partnership in sustainable coffee cultivation and community development
- CERTIFIED BIRD FRIENDLY HABITAT - ORGANIC CERTIFICATION - SMALL FAMILY FARM COOPERATIVE MODEL - CHAMPIONS OF BIODIVERSITY
Experience Our Legacy
Join us in our mission to create exceptional coffee while making a positive impact on communities and the environment
Cupping Lab Revolution
Developed the world's first cupping labs owned and operated by small-scale farmers and cooperatives
State-of-the-art cupping lab development in Nicaragua. Global Impact that enabled the development of 3rd and 4th wave artisan coffee techniques.
Environmental Leadership
First to establish industry-wide sustainability standards
Community Innovation
This isn't just about buying beans; it's about nurturing relationships that transform communities.
Our true measure of success is the lasting impact we create in coffee-growing communities around the world.
We are continuing the legacy of exceptional coffee that makes a difference.
Lavender Grace is the Sustainability Consultant for Thanksgiving Coffee Company
Stay in touch - we like to stay connected
Ethically Sourced, Artisan Roasted
read more


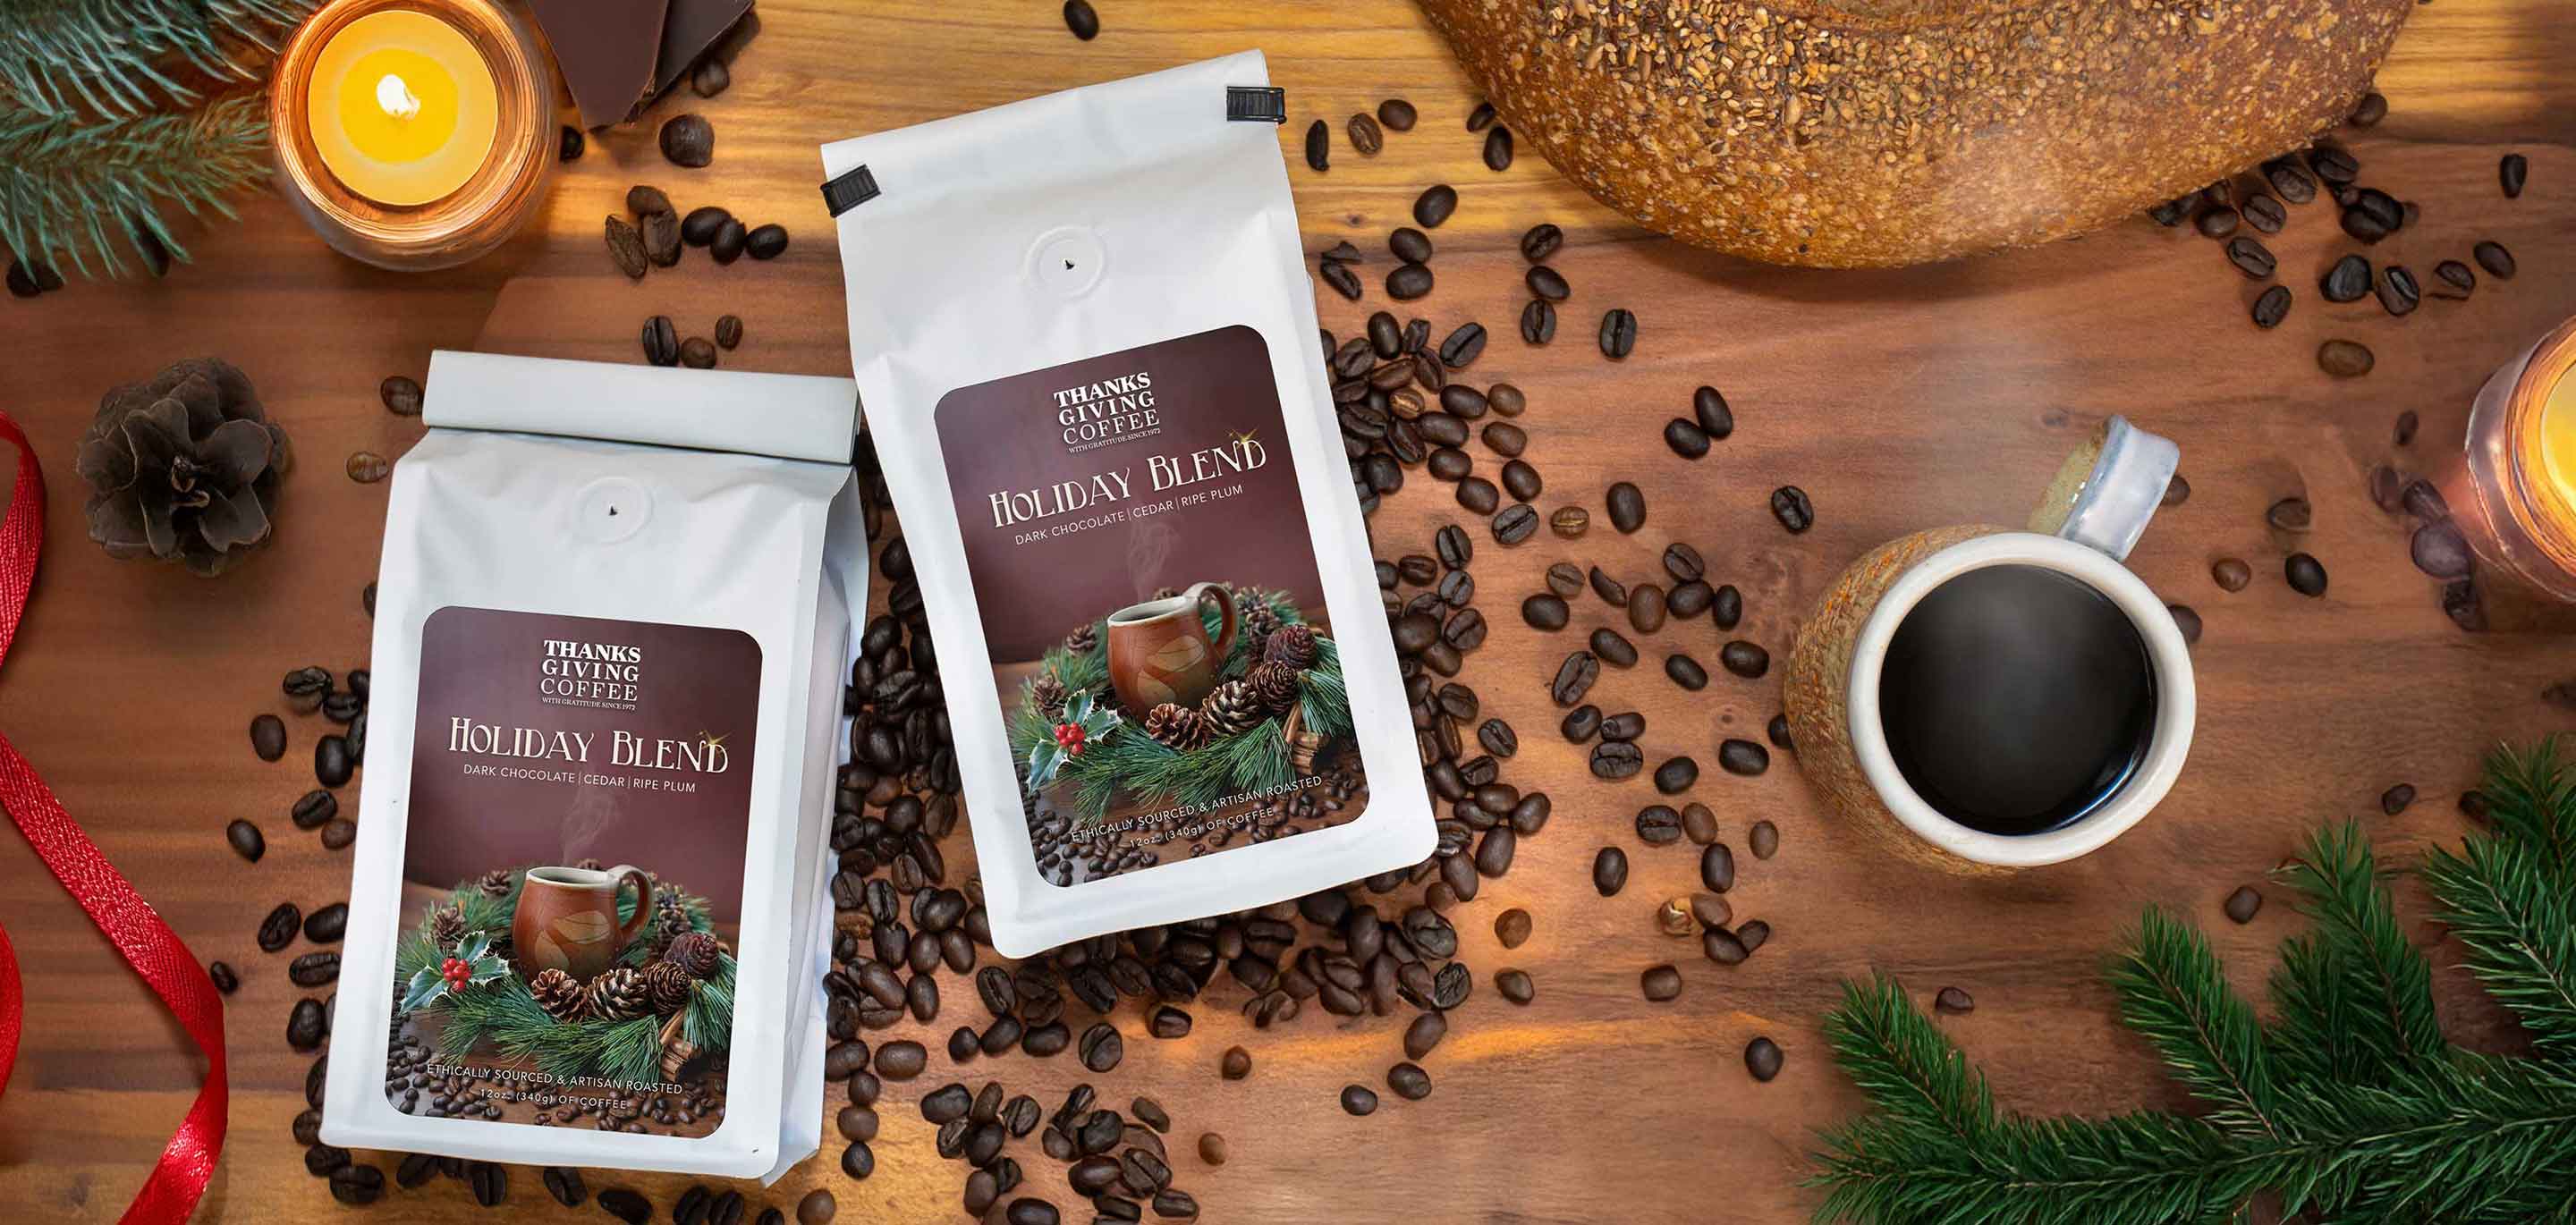


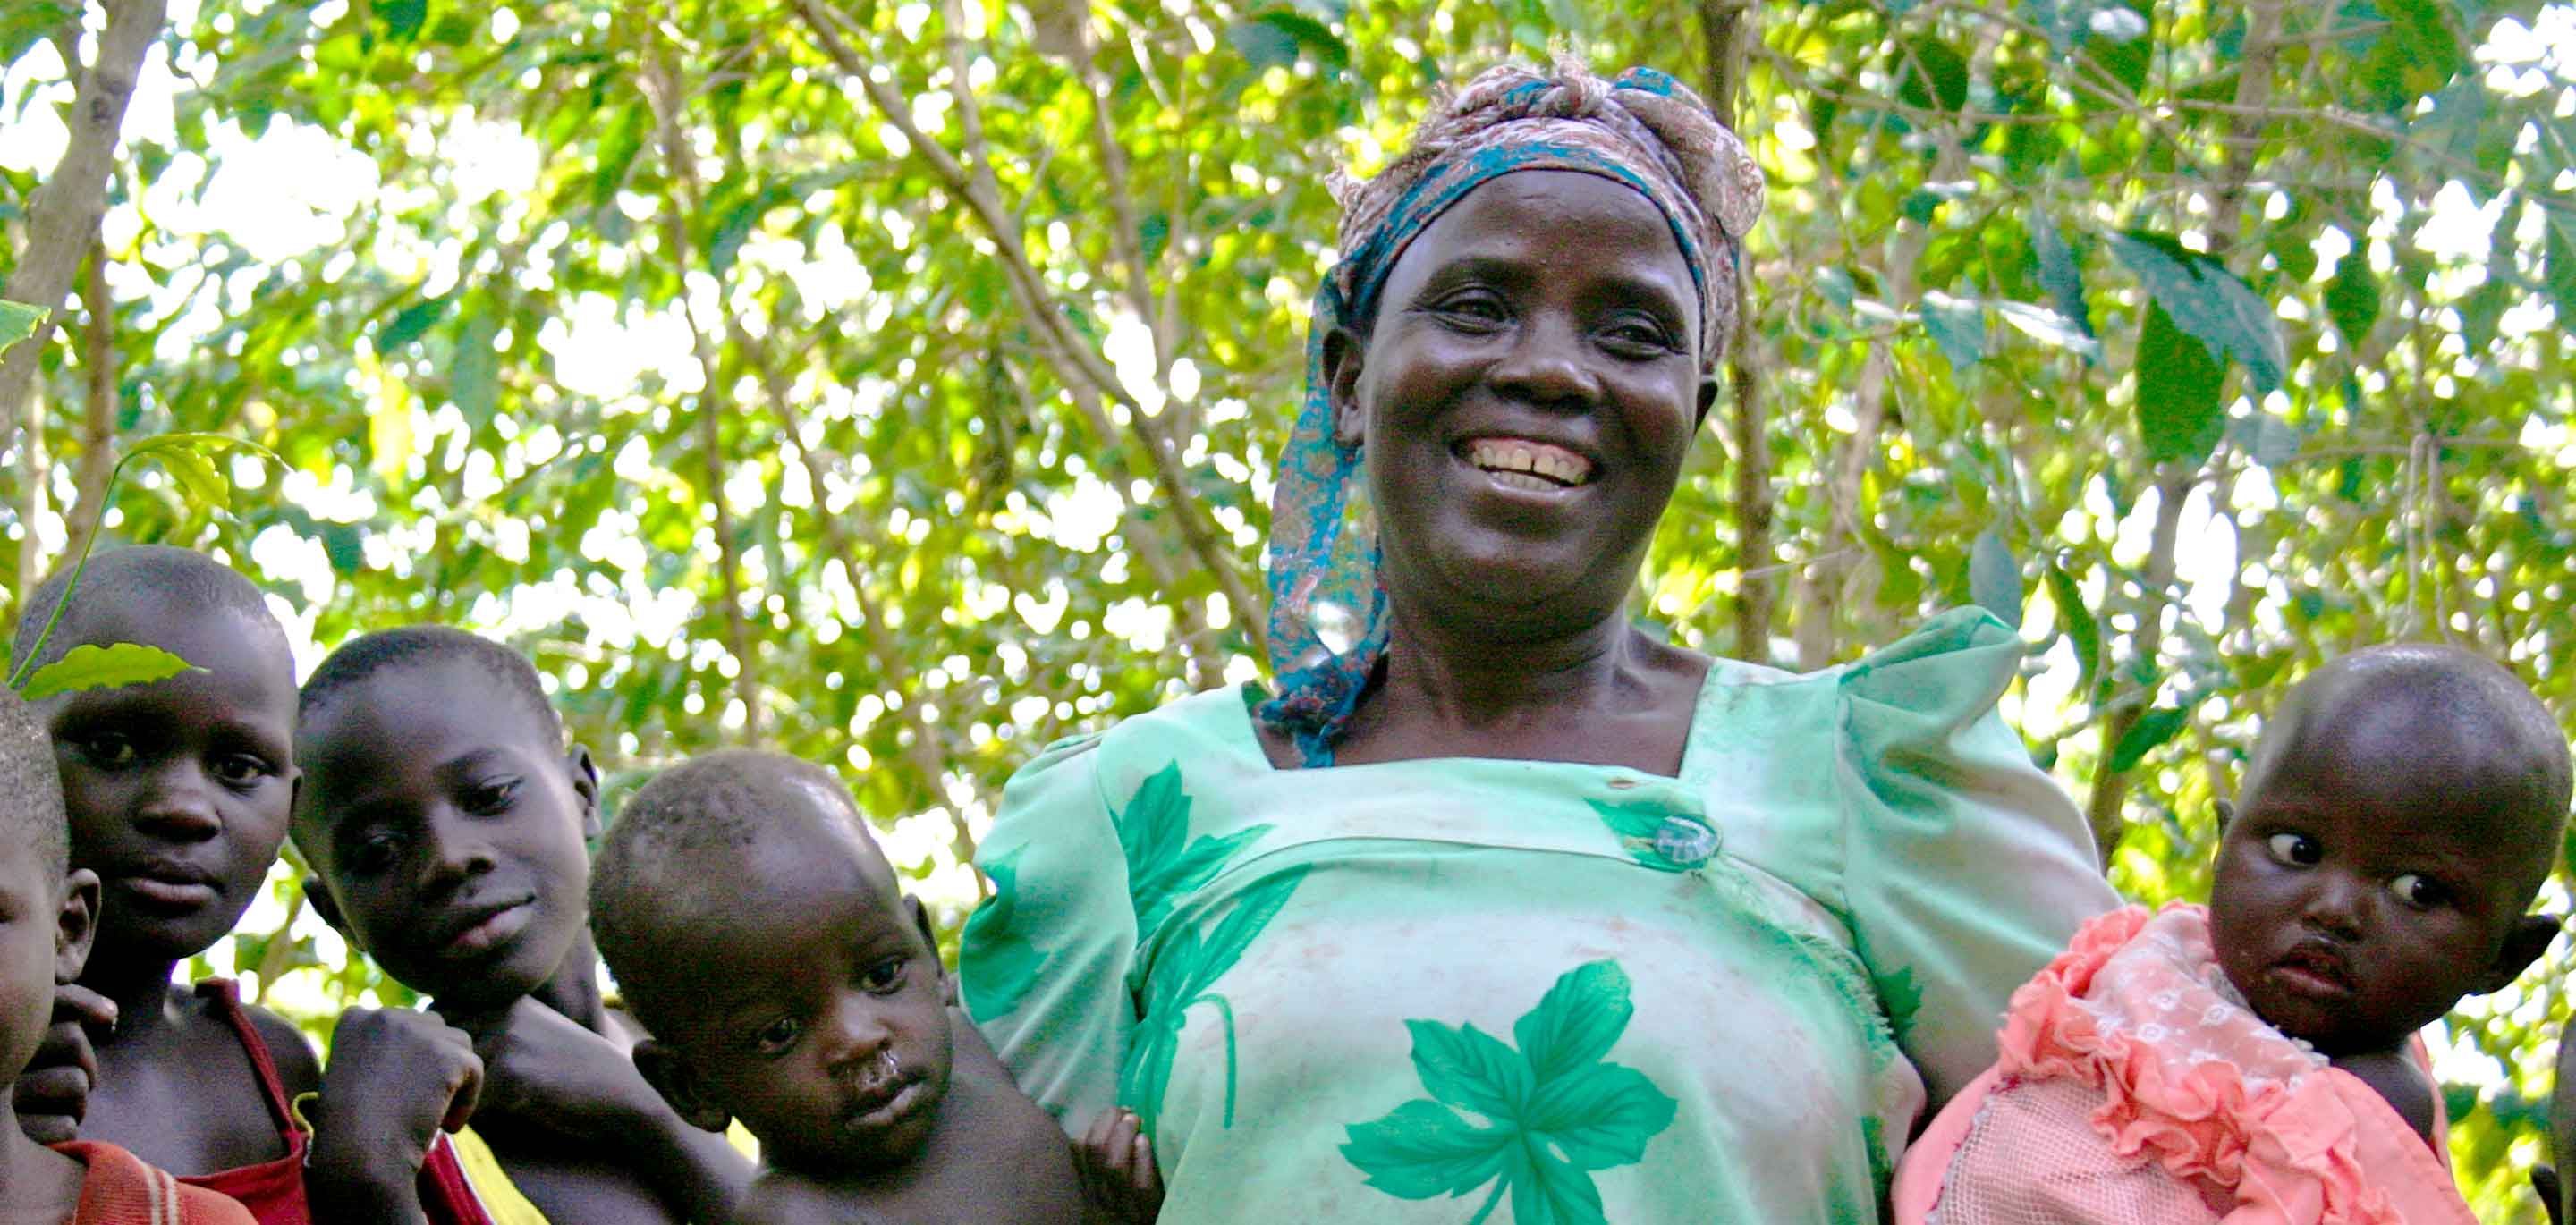


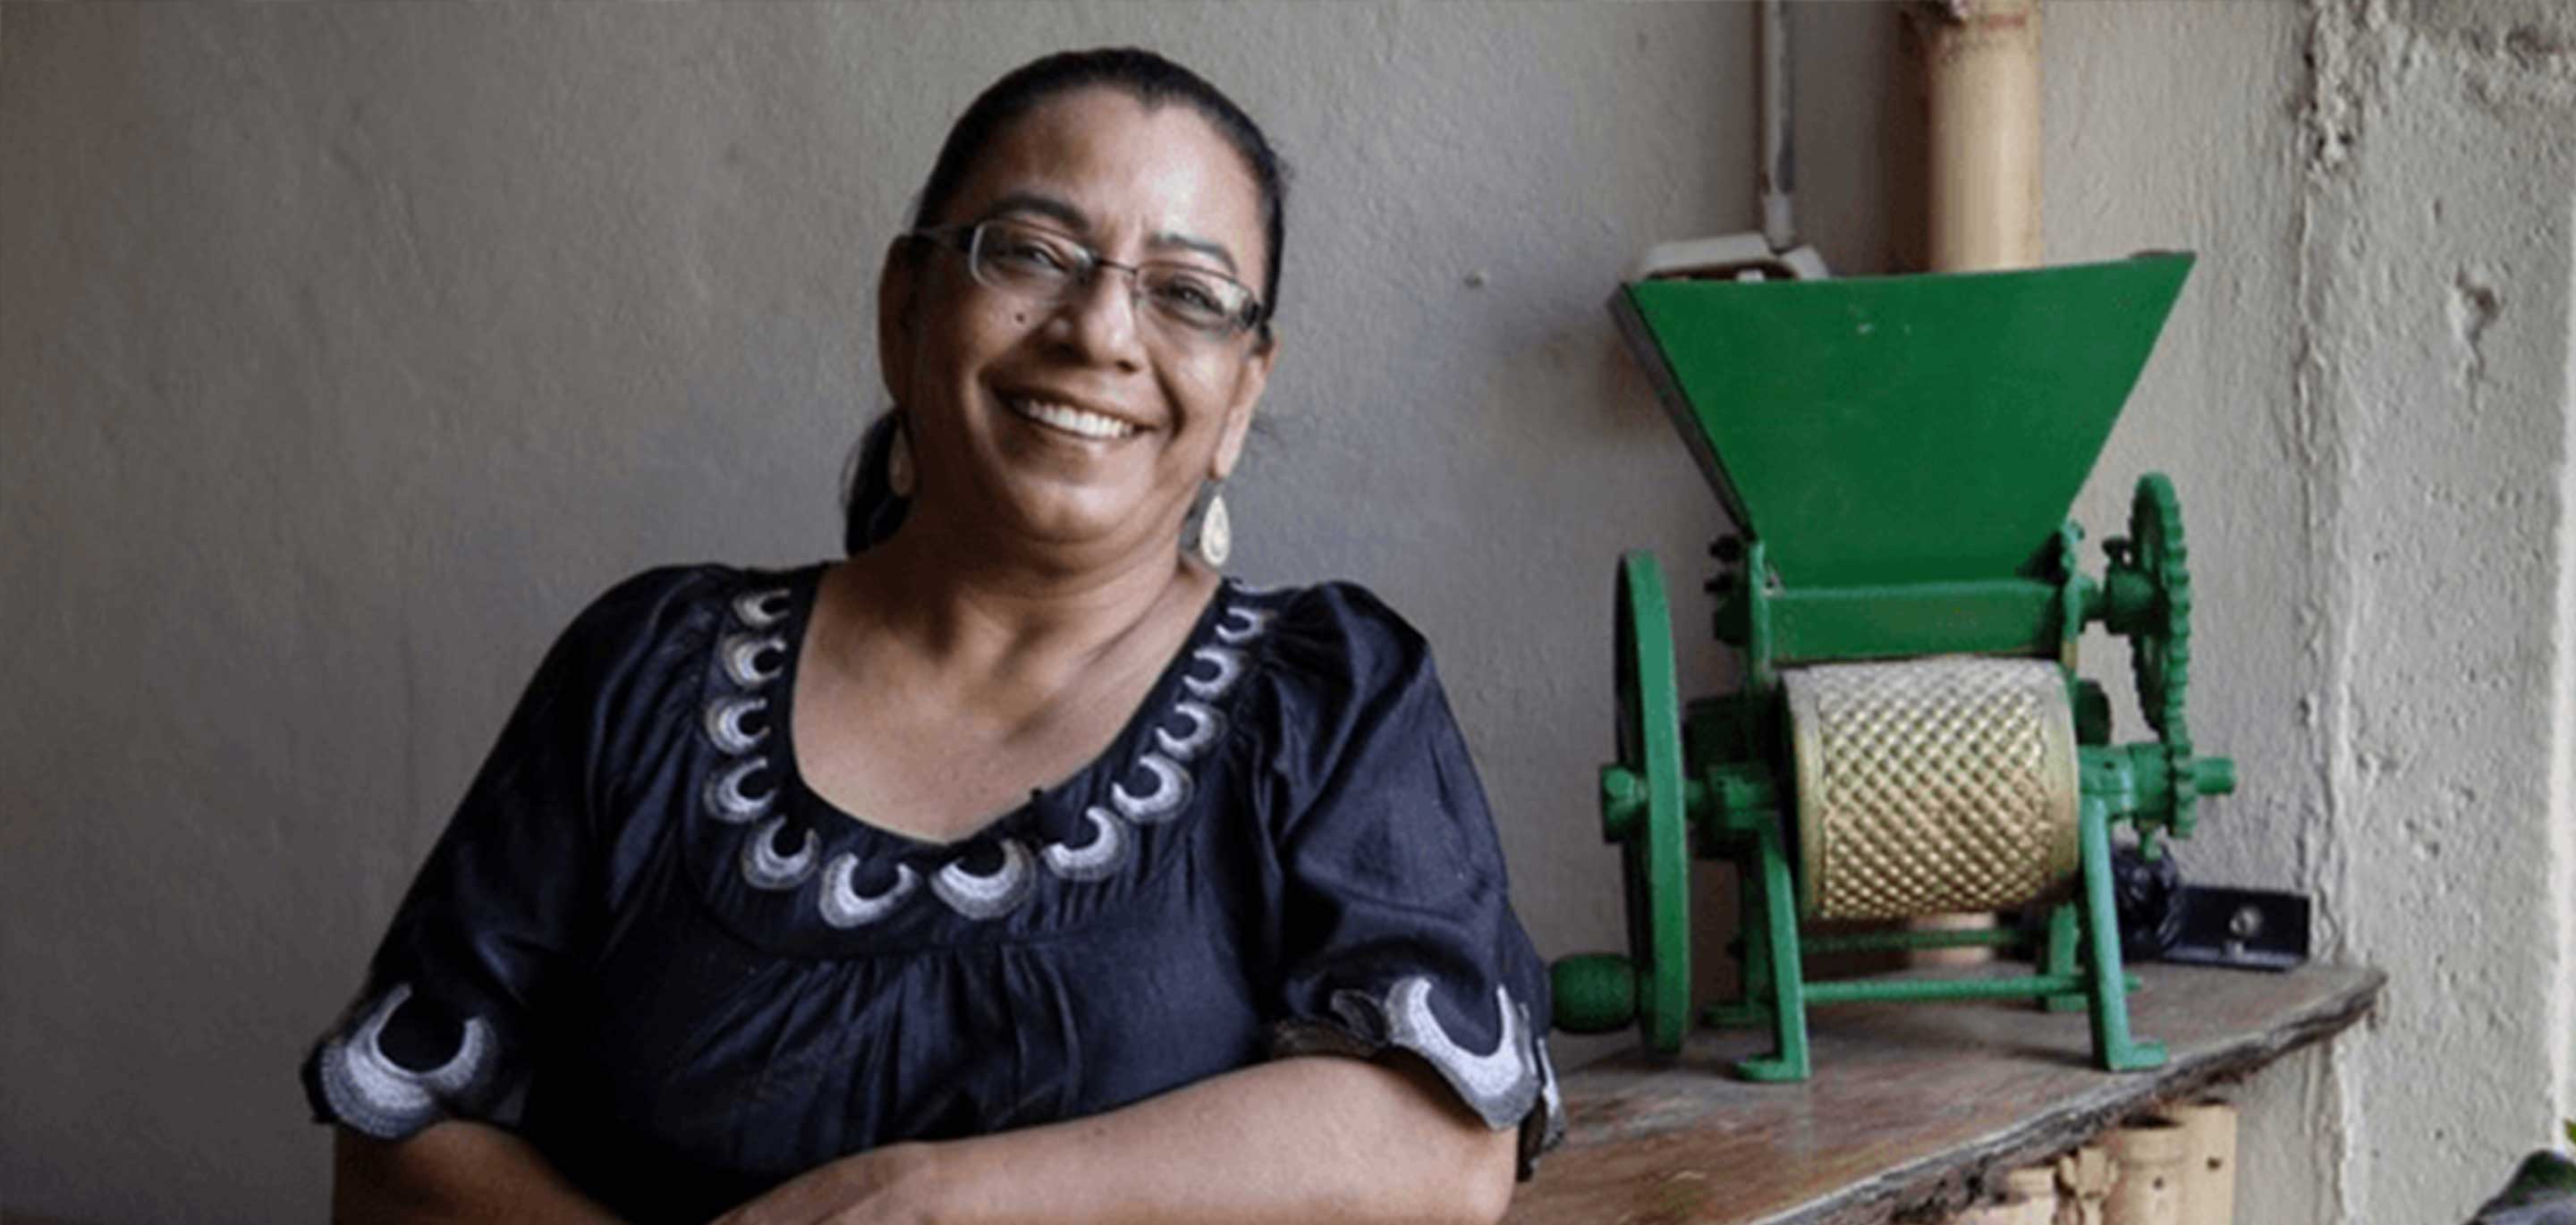

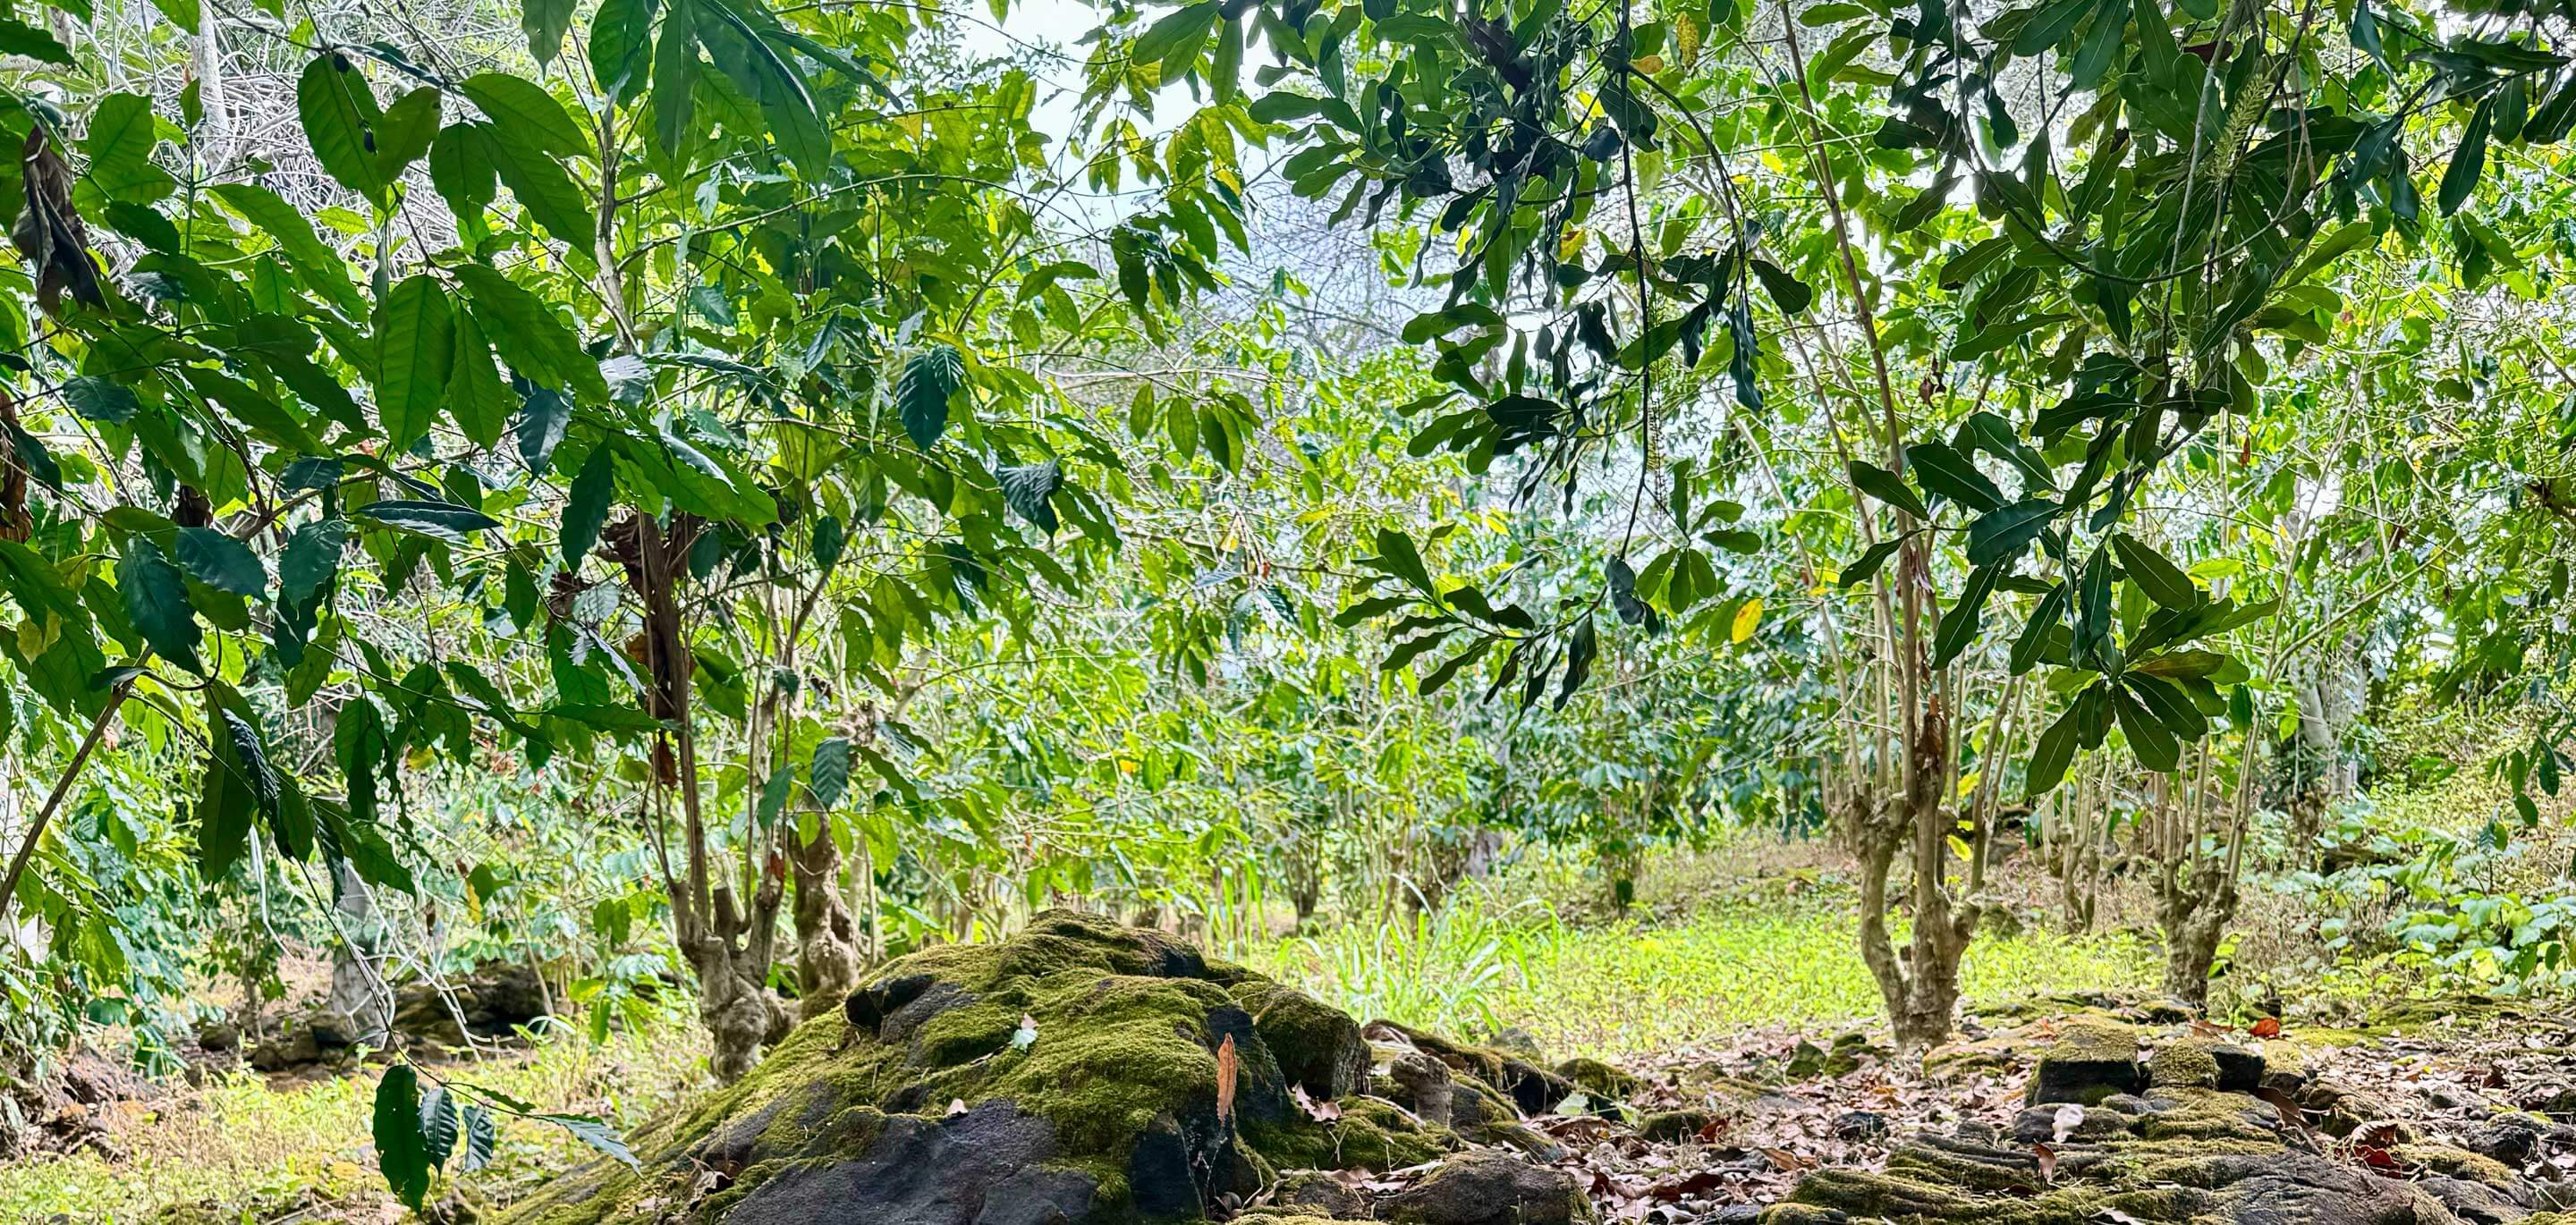


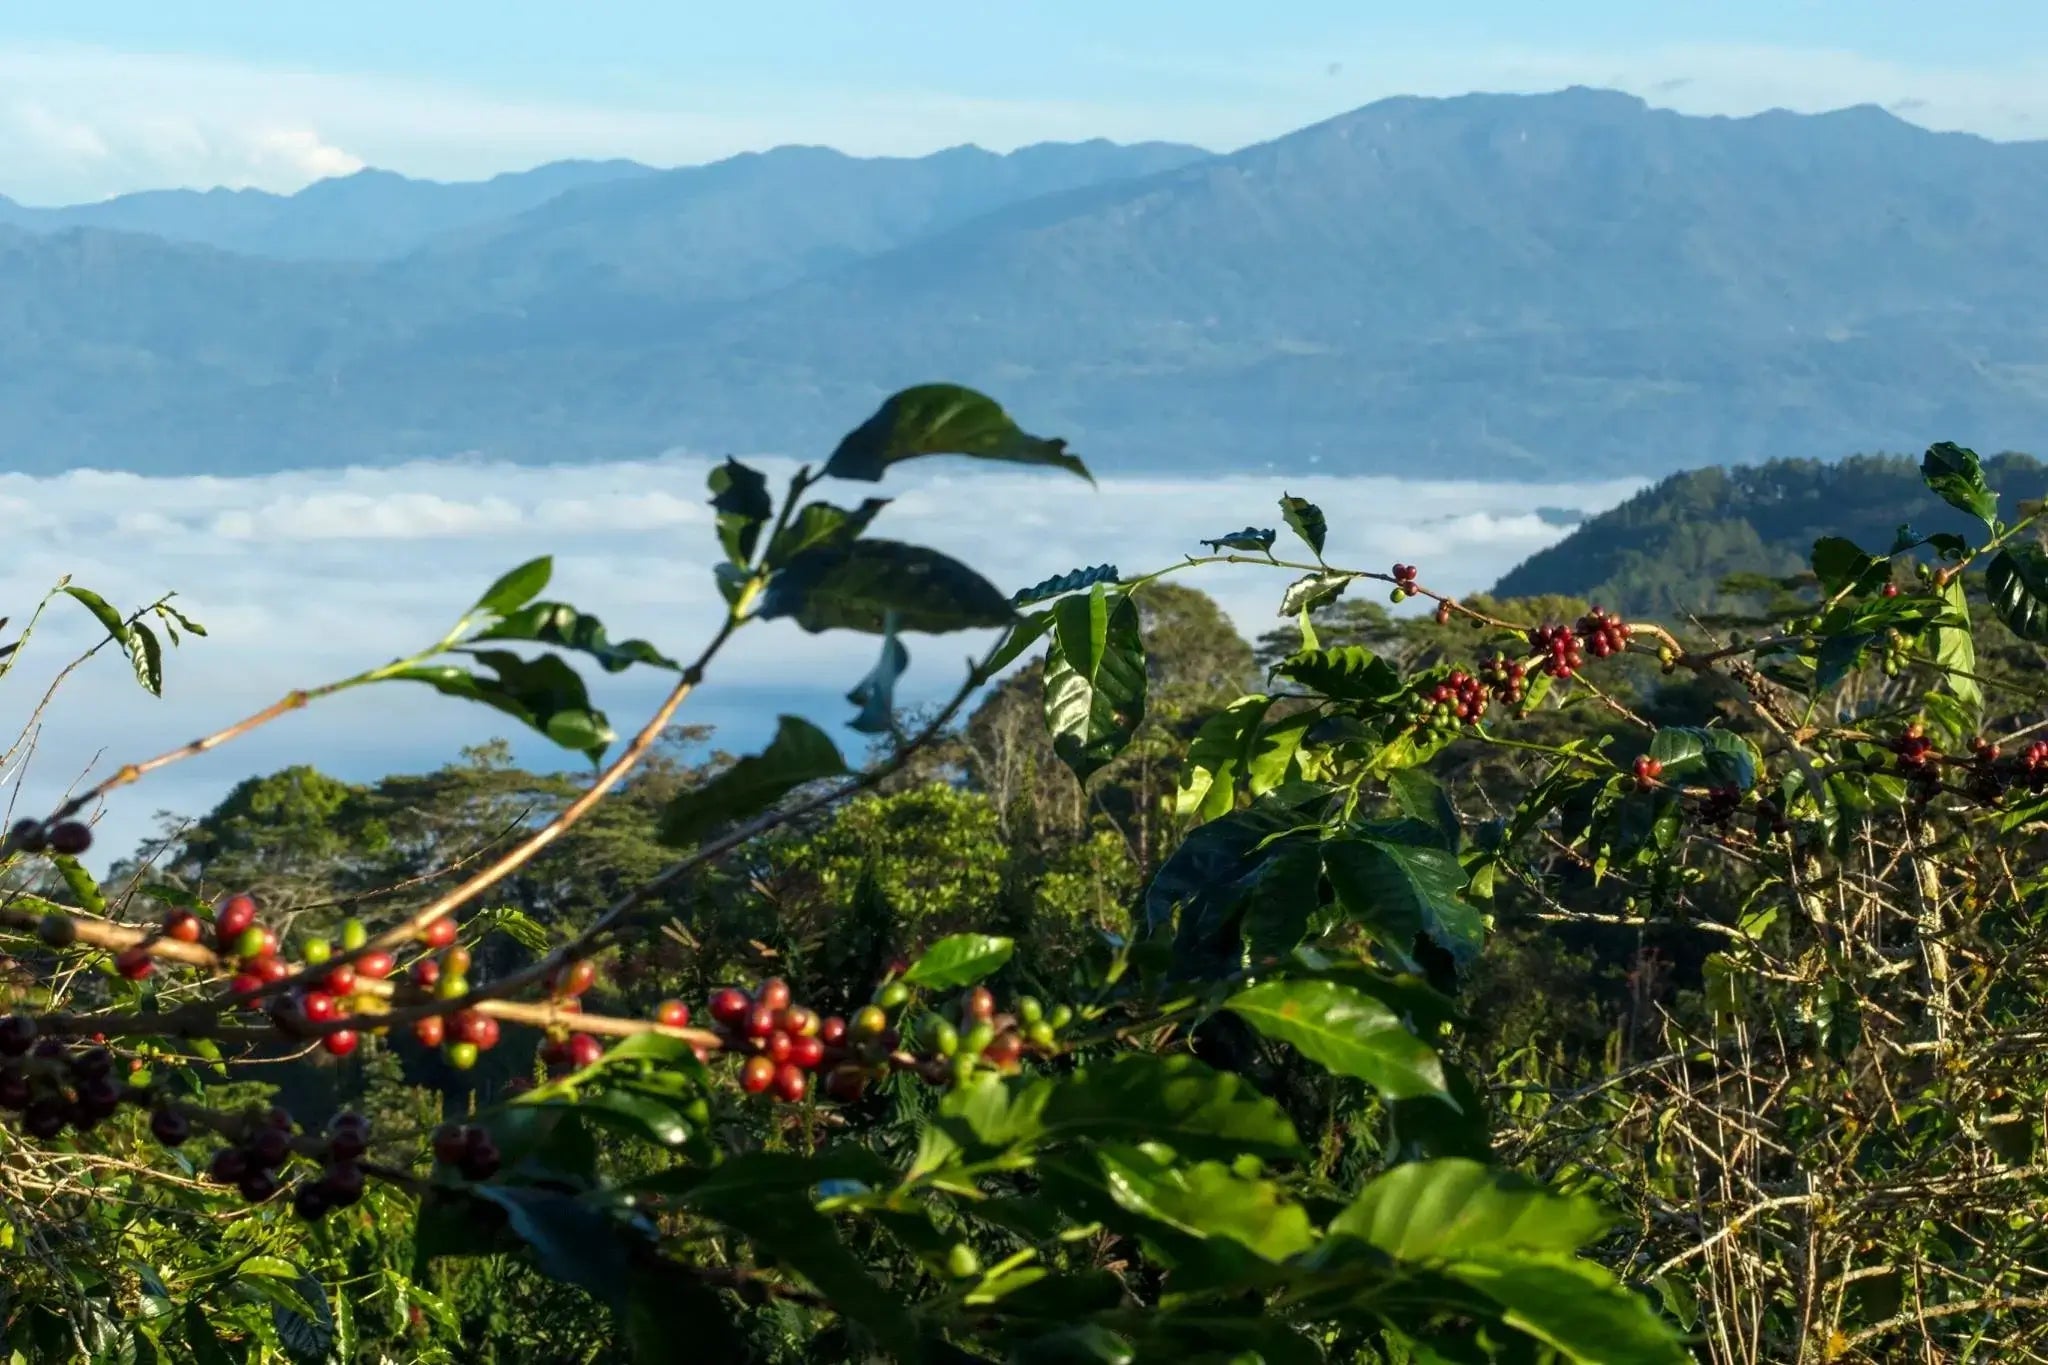

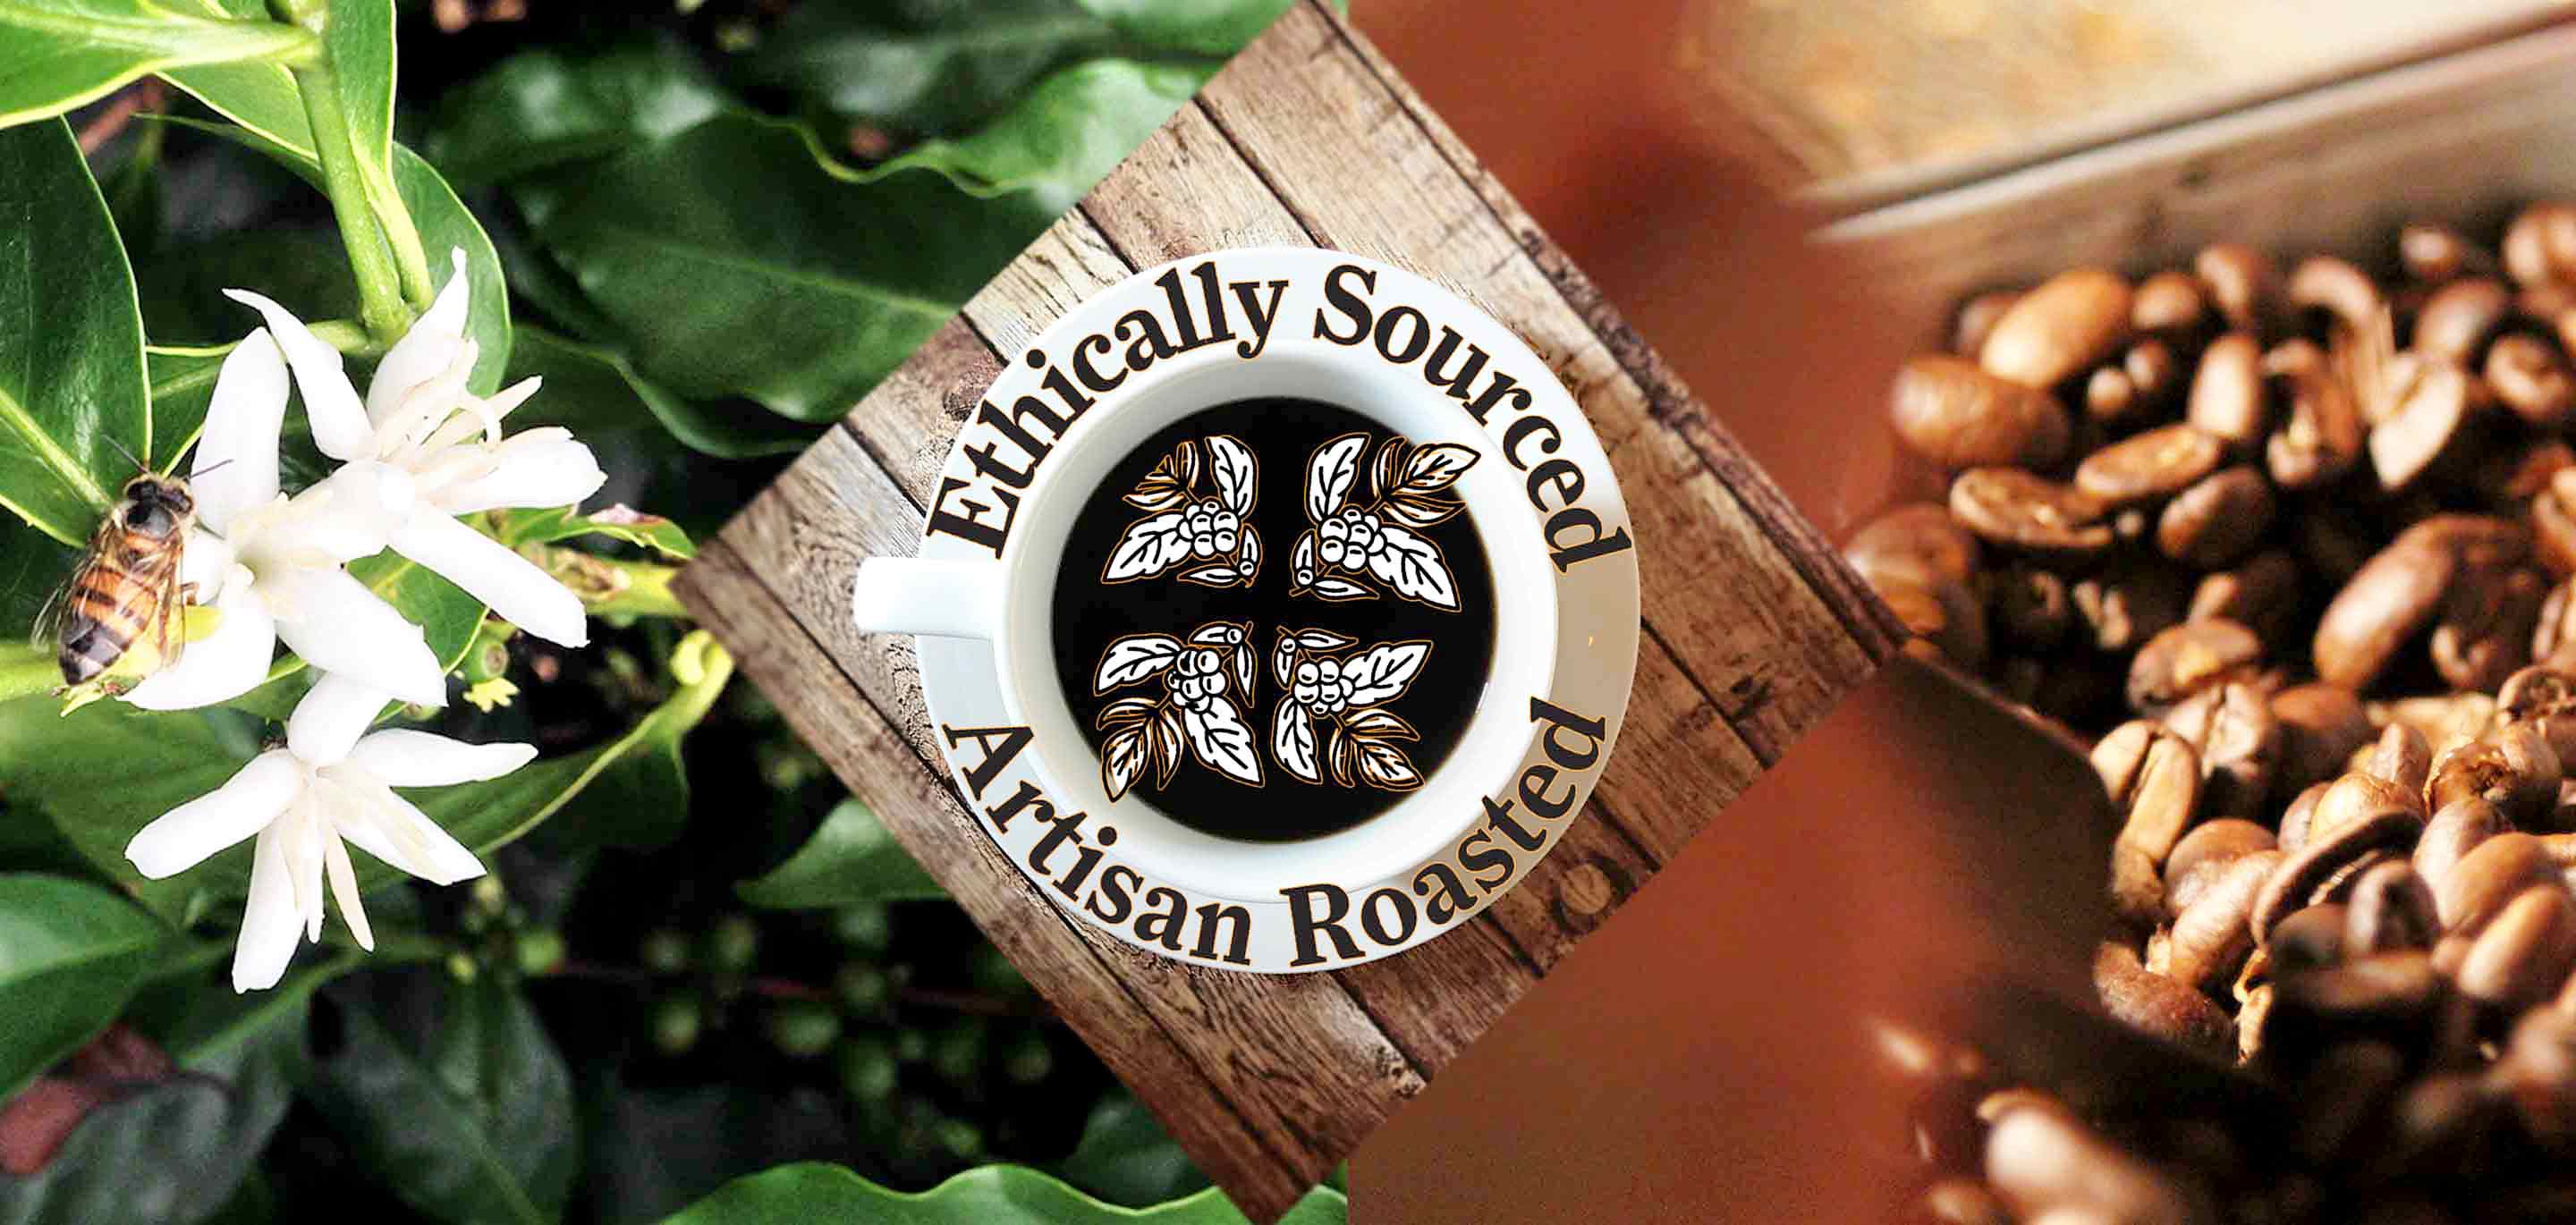
